Categories
Cakes The Book

202. Carrot Cake with Cream Cheese Frosting p.726


The recipe courtesy of The Ulterior Epicure

Sometimes the stars just don’t align, and the baking Gods abandon you for a day. I’ve learned a lot about cooking and baking through this project, and I’ve gotten to a point where I rarely make the boneheaded mistakes that plagued my early experiments, but there’s always room to regress. Today’s flub up was ignoring the instruction to “butter and flour cake pans, knocking out excess flour”. Every single baked good in the book calls for this step, and it’s become such a familiar phrase that I think I literally didn’t see it when reading the recipe. Sure something felt wrong while I poured the cake batter into the pans, but I was working on three other things at the time and didn’t give it much thought. The finished product suffered as a result, but I’m going to rate it anyway.

This is a pretty straightforward cake, but it does have quite a few ingredients. Beyond the basic cake stuff (flour, baking soda, baking powder, and salt, vegetable oil, eggs, sugar) the cake mixes in a healthy dose of grated carrot, cinnamon, crushed pineapple, sweetened flaked coconut, walnuts, and raisins. The raisins were optional, and I opted against. The cakes are split into two 9 inch round cake pans and banked for ~40 minutes. Once cooled they’re stacked and frosted with whipped cream cheese, butter, vanilla, and icing sugar.

The Good: The cake tasted great. It had excellent carrot flavour and the cream cheese frosting wasn’t too sweet or too heavy, and set the cake off nicely. I like walnuts in a carrot cake, and this one was no exception. The frosting had a great texture, going on easily, and holding its shape quite well, as you’ll read below the underlying cake had some serious structural issues, but if I had to try to ice something with the texture of a jello salad again, this would be a pretty good frosting option.

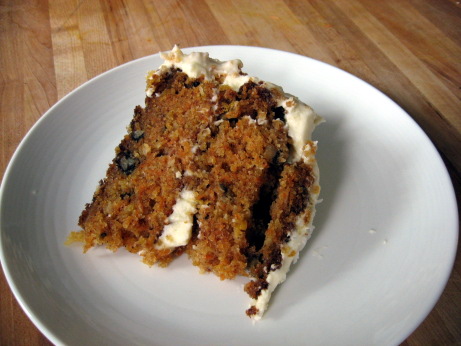
The Bad: My main issues with the cake were with the enormous almost goupy crumb of the cake, and its total lack of structural integrity. The recipe describes it as an unusually moist cake, but I think my mishaps turned a moist cake into a barely solid cake. Without the butter and flour in the pans, the cakes stuck. The first cake I tried to unmould fell to pieces, with the baked-on bits staying firmly in the pan, and most of the extremely moist and soft innards flying through the cooling rack I was trying to unmould onto. I tried to free up the bottoms, but the cake was just tearing while it was still warm. Instead of cooling the cakes on racks, I left them in their pans, and was able to get an offset spatula in to free them up once they’d cooled. This probably means that the cakes steamed as they cooled, instead of crisping up on the outside. I can’t know how the cooling in the pan affected the texture of the cake, or how the rough extraction from their pans affected the overall integrity of the cake. As it was, the cake was nearly impossible to cut, it was as malleable as an angel food cake, and the slices crumbled as I tried to serve them. Even chilled the next day getting a piece out as a whole was a challenge. The soft and goopy frosting added more to the structural integrity than the cake itself. The pineapple was added to this dish to make it extra moist, and it did its job. At least with my mixed up cooking instructions that extra moisture probably made a bad situation worse. More importantly, it didn’t taste all that good. I don’t think carrot and pineapple are a natural pairing, and I just found it out of place.

The Verdict: A lot of what went wrong with this cake was totally my fault, but things like the over-large crumb, and not so nice addition of pineapple were certainly problems with the recipe. Looking beyond the serious textural issues, the cake did taste very good. It wasn’t my absolute favorite carrot cake, but it did a good job of delivering carrot flavour in a cream cheese icing package. I suspect that baking this in a 13×9 pan instead of trying to make it a layered cake would make the textural issues much less important, and it would be just as delicious. The cake that I produced was not fit to serve to guests, and the cake I made is the cake I have to rate, but I think I’m going to give this recipe another chance in the next couple of months, and I might decide to revise the rating upwards then.
Categories
Salads The Book

201. Caesar Salad p.136

I can’t find the recipe online.

Caesar salad is pretty much always good. The only way to really truly mess it up is to use wilted, or flavorless lettuce. I’ve seen it done, I had a chicken Caesar at a Boston Pizza that was an insult to the whole concept of food, but generally they’re a safe bet, with a chance of being tasty. Growing up my dad made Caesar dressing regularly for a few years, then stopped despite our protests. He’ll make it very occasionally now, but I can’t get a straight answer as to why the Caesar train dried up. His Caesar was excellent, but my mother in law’s is among the best I’ve ever had, and she’s always happy to make one. She just sent me the recipe today, and we’ll be trying it out. I’ll let you know how mine works out in the comments. The Book’s recipe doesn’t hold a candle to either of those versions.

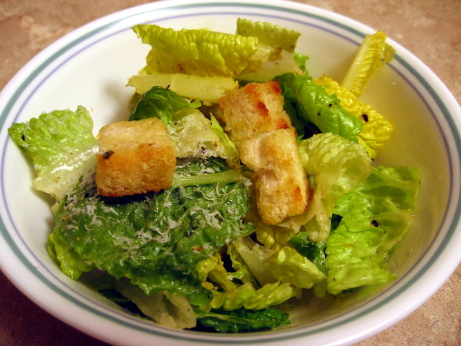
The recipe starts with making croûtons from firm white sandwich bread, toasting them for 10 minutes at 350, then tossing them with a mashed garlic, olive oil, and salt, then toasting for a few minutes more. The dressing is olive oil, egg yolks, lemon juice, white wine vinegar, Worcestershire sauce, salt, and minced and mashed anchovy. You toss romaine with the dressing, grate Parmigiano-Reggiano on top, and add the croûtons, along with salt and pepper, then toss again and serve.

The Good: The croûtons were very tasty indeed. 5 slices of bread worth of croûtons were tossed with 4 tablespoons of garlic oil, so each and every croûton got a good soaking of delicious delicious oil. I used nice crisp romaine hearts, and good cheese so we were well on our way to a very nice salad.

The Bad: The dressing for this salad was lackluster, in fact I probably wouldn’t have guessed that it was supposed to be a Caesar dressing. It was nearer to a vinaigrette tossed with a bunch of cheese. I think it’s a problem of technique, the recipe asks you to whisk together the oil, egg yolks, acids, and flavourings in a small bowl, in no specific order.  Those ingredients are otherwise known as mayonnaise if you whisk vigorously and add the oil to the other stuff in a very slow stream. As written the dressing was thin, but a better emulsion would have given the salad that creamy coating texture that makes Caesar great. The proportions were generally good, but there was too much Worcestershire for my taste, I’d cut the given 1 teaspoon down to 1/2 teaspoon, or even just a few dashes. The other weird aspect of the recipe is that all the garlic is in the croûtons, and none in the dressing. The traditional table-side Caesar preparation in a restaurant has the waiter rubbing the bowl with a garlic clove, that then gets mashed into the dressing. I decided to do something of the same thing and tossed my croûtons with their garlic oil in the bowl I eventually used for the salad. I think leaving all the garlic on the croûtons would have been a mistake. Finally, despite vigorous mincing of the anchovies, there were still a few clumps of salty fish in the final dressing. Not a problem for my sister or me, but my dining companion was not pleased.

The Verdict: I wasn’t optimistic about this salad as I was making it. It didn’t really look right, and tasting the dressing on it’s own I was overpowered by the Worcestershire. Once it was all together it was actually a pretty good salad, just not what I’d ordinarily think of as a Caesar. The lack of texture in the dressing just weirded me out, although all of the basic flavours were there. That said, I went back for seconds of this kinda-sorta-Caesar salad, and my sister who took the rest of lunch the next day said it had improved with age (here’s for hearty romaine that still fine 16 hours after being dressed). Almost all Caesars are good Caesars, and this one tasted just fine, but it was far from the best of my life.

Categories
Beef, Veal, Pork, and Lamb The Book

200. Roast Pork Shoulder Cubano: Puerco Asado p.477


The recipe

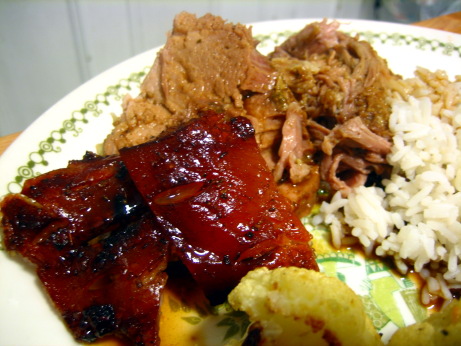
Very few things in life are as good, or as simple as roast pork. The bachelor party tradition among my group of friends is to spit-roast a pig over charcoal. We recently went in on a roaster and put it through it’s paces before my wedding. Spending the afternoon hanging out and watching the pig spin is as near a perfect Saturday as I can imagine. The beauty of roasting pork is that you really don’t have to do much of anything to it, you just have to be very patient and let it get there in it’s own time. Even if you only rub it with salt, it will be fantastic. A few well chosen herbs and spices can make it even better, but you don’t want to overwhelm the awesome goodness that is roast pork. This recipe comes pretty close to replicating what I love about a whole rotisserie pig. If you don’t happen to have a giant roasting pit, or twenty friends to help you eat a whole pig, an oven roasted pork shoulder is a good way to go.

In this recipe starts with an 8 lb skin on picnic shoulder. The higher end grocery stores in my neighbourhood never carry these (one of them doesn’t carry any part of a pig or cow forward of the tenderloin), but they’re a staple at the more budget minded stores. At a dollar a pound, I can’t afford not to cook with pork shoulder. You start by stabbing 1 inch incisions in the skin with a very very sharp knife. This is by far the hardest part of the recipe, but it’s a nice way to get some aggression out. You then fill these incisions with a mixture of lime juice, garlic, salt, oregano, and cumin. More of the mixture gets rubbed onto the meat not covered with skin. The pork goes into the oven, with lime juice drizzled around it. The recipe asks for a roasting pan, but I used a dutch oven, which worked out just fine. After 30 minutes water and vinegar are added to the pan, and it’s left to roast covered for two hours, basting halfway through, and making sure not to get the precious cracklings wet. You then separate the skin from the meat, and roast uncovered for another hour and a half, basting under the skin every 20 minutes. When the skin is crackly and crisp you remove the roast and let it stand for 20 minutes, then carve. It’s served with the defatted pan juices, and cracklings.

The Good: This tastes absolutely fantastic. The meat is rich and succulent, mildly flavoured by the spices, but not so much as to distract you from the porcine bullet to the taste centers of your brain. The cracklings were out of this world. They turned a perfect mahogany, and with an extra sprinkle of salt became the perfect indulgence. Other than getting through the pig skin, the recipe was dead simple, used very easy to find ingredients, and even the poorest students can afford to make it.

The Bad: Preparing this can be a little dangerous. If you don’t have wickedly sharp knives, they’re likely to turn on you when trying to get through the skin. I nearly cut myself. A double edged knife, dagger, shiv, or any other type of stabbing weapon would probably be a lot safer. This recipe also takes quite a long time (count on five hours from start to finish), and sitting around the oven drinking beer has less appeal than the hypnotic rotation of a pig on the spit. That said, there’s very little intervention needed on your part. Making this again I would try to slice it. It kind of fell apart and came away in chunks. It’s basically pulled pork, so why not pull it? Next time I’ll pull the meat, and toss it with a little of the pan juices.

The Verdict: Eight dollars resulted in a fantastic dinner, and out of this world sandwiches for two for most of a week. Beat that. There are amazing things that can be done with pork shoulder, but a lot of them require special equipment, or more intervention on your part than this dish. If you do have a charcoal grill, this dish would probably be even better with long slow offset cooking, regular basting, and some smoke. But turning on the oven sure is a lot simpler, and nearly as delicious.

Categories
Grains and Beans The Book

199. Foolproof Long-Grain Rice p.254

The recipe

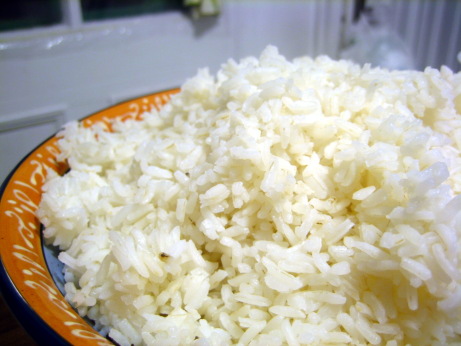
Calling this a recipe is a bit of a stretch. It’s one step away from reading “follow package directions”. The ingredients are salt, long-grain white rice, and water. Normally I cook rice by boiling salted water, then adding rice, letting it come back to a boil, then reducing the heat to low and letting it steam for 20 minutes, then a 5 minute rest, off the heat, before serving. The only twist this recipe adds is that after adding the rice you let it boil for a few minutes until steam holes form in the surface, and the top looks dry. It then gets 15 minutes over lowest heat, and a 5 minute rest.

The Book claims to provide every recipe you’ll ever need, and I guess a basic rice recipe is important. The book doesn’t include recipes for plain cooked pasta, or boiled potatoes, but I know enough people who claim not to be able to cook rice that this is probably worthwhile.

The Good: This recipe produces properly cooked rice. The grains were fluffy and separate, soft with a little bit of bite left to them. It’s a simple thing, but poorly cooked rice can be a real disappointment.

The Bad: This technique is ever so slightly more complicated than the dump-the-rice-in-the-boiling-water-and-wait-20-minutes strategy, and I’m not sure the results are any different. Boiling until steam holes appear guarantees that the ratio of water to rice is correct, and if you’re worried about getting the rice just right by all means do this, but I get generally good results with my standard method.

The Verdict: My rice palate is pretty poor, to me, this rice was just as good as what I get by following the instructions on the package. However, the slim percentage of the population who eat rice often enough to have opinions about it, but don’t have a rice cooker, might get some added benefit from this technique.

Categories
Breads and Crackers The Book

198. Currant Tea Scones p.598

The recipe

Scones are serious business. Done right, they’re transcendent, rich, with just a hint of sweetness and a striated flaky texture. A scone should be substantial, but not dense. Unfortunately they’re often done very very poorly. Starbucks gets my vote for worst mass market scone. Their oversized scones are dense enough to sink, and so dry you can’t get through a bite without a sip of coffee. The few times I’ve eaten them I’ve ended up with an Elmer’s school glue paste in my mouth, and a boulder in my stomach. This scone philosophy may work for Starbucks’ bottom line, but it has no place in my kitchen.

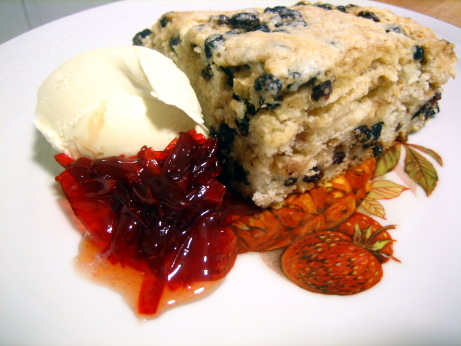
This recipe has a much happier take on the classic British treat. Here you make a quick dough by working butter into a mixture of flour, sugar, baking powder, and salt, then gently mixing in half-and-half until a sticky dough forms. You stir in currents which have been plumped in just a couple of tablespoons of hot brewed tea, form the dough into a disk, score it, brush it with half-and-half, then sprinkle it with sugar and bake.

The Good: The scones came out with pretty much the texture I was hoping for, tender-chewy cake stacked in airy layers. The cream and sugar brushing gave a nice gloss to the upper sides, and the bottoms were just barely golden. All in all a pretty darn good scone.

The Bad: I’m quite picky about scones, so while the results were generally good, there was room for improvement. First, they were a little too dry, substituting full fat cream for half-and-half might have taken care of that. Second, I like currants as much or more than the next guy, but half as many would have been plenty. Third, I wasn’t a huge fan of the bake, and then cut, plan with these. I prefer to bake scones separately, because the sweet and shiny outer layer is the best part. This cut-a-disk-up-like-a-cake strategy messes up the surface to volume ratio. Fourth, I thought going in that soaking the currants in tea might add a tea flavour to the scones, but it really did nothing at all. There’s nothing wrong with not-tea-flavoured scones, but the plumping in tea step was a bit of a waste of time. If there’s no way to get the tea above the threshold of human perception I’d just use hot water instead. Finally, this recipe is for an unusually small batch. It makes just 4 scones. That’s about breakfast for two. If I’m going to go to the trouble of making scones I’d like to count on some leftovers, so I’d plan on doubling or tripling the recipe.

The Verdict: Overall this is a solid scone recipe. It’s not my ideal, but I think scones are largely a matter of personal taste. It comes fairly close to what I’m looking for in a scone, and it’s a good basis for further experimentation.

Categories
Fruit Desserts The Book

197. Balsamic-Roasted Pears with Pepper and Honey p.809


The recipe

This is how dessert should be, simple, elegant, and not too heavy. I’m rarely in the mood for a slice of cake right after dinner, and the yen for creamy or frozen treats is even more infrequent. However, a cheese plate is always a welcome addition to a meal. I associate this kind of dessert with Italy, almost every menu has some combination of pear and cheese, and honey is a common touch. One handwritten menu I saw there advertised the Cheese and Fear plate, I was hoping for a high concept dessert, but it was just a typo. 

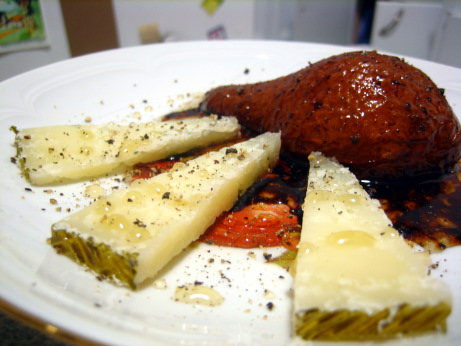
The dish is simple to prepare. You roast pears in a buttered dish for 20 minutes, then pour balsamic over-top and roast for 5 minutes more. Plate the pears, drizzle them with the juices in the pan, and serve with slices of Manchego. Drizzle the plate with honey, and a few grinds of pepper, then serve. 

The Good: With hardly any effort you can create a satisfying end to a big meal. It can pretty well all be done ahead, just pop the pears in the oven while you’re clearing the dishes, and they’ll be ready once everyone’s finished up their glass of wine. The presentation is really simple, but it looks great. Pears have a great affinity for cheeses, and the balsamic glaze makes the whole interaction more appealing. The few grinds of pepper emphasize the sweet-savoury interplay of the dish. 

The Bad: For my money, this dish could have moved a little more to the savoury side. I found the total effect of the roasted pears + balsamic + honey to be pushing the balance too far to the sweet. A more assertively flavoured cheese, or a more acidic balsamic might have brought things into balance. Also, some nuts would have been a very nice addition to the plate. Roasting pears is a delicate affair. I like them roasted so that they loose their gritty-grainy texture, but I don’t want them to turn to mush. Mine ended up a little too firm, half an hour in the oven might have served them better.

The Verdict: Overall I was quite happy with this dish, and I’ll certainly make variations on it again. I think disliking sweet desserts is largely my own personal issue, so it may not turn others off this dish at all. Even with a little more sugar than I would have liked it was an excellent way to finish our dinner.

Categories
The Book Vegetables

196. Sautéed Kale with Bacon and Vinegar p.541


The recipe

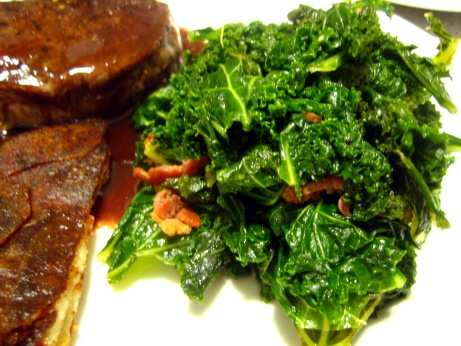
The Book has got quite a few recipes that follow the [bitter green] + [cured pork] + [some acid] = [delicious] formula. In this case the bitter green is played by kale, cured pork by our perenial favourite: bacon, and cider vinegar is taking on the role of acid. You simmer the kale for a few minutes while crisping the bacon in a pan. After pouring off most of the bacon fat, you add the drained kale to the bacon, and sautée for a couple of minutes. Once it’s off the heat it gets a quick spash of cider vinegar, and it’s time to eat.

The Good: We eat a lot of bitter greens, and this variation on the theme is one of the better ones. Kale is particularly nice because it retains a lovely bright colour even when it’s cooked. The bacons smokey sweet and salty fattiness plays perfectly witht the bitter turnipy kale. The sweetness and acidity of the cider vinegar tie it all together nicely. This dish takes about seven minutes to make, and it tastes wonderful.

The Bad: There’s not much bad to say about such a classic combination. It works. Bitter green haters have aready stopped reading this post, so no need to pander to them. The only reservation I’d have about serving this is if the other items on the menu were very mildly flavoured. This dish packs a big punch, so pair food accordingly.

The Verdict: This is a winner. We eat some varition on this formula frequently. Our doctors tell us to eat more bitter greens, and this makes doing so a pleasure. Sure, it involves bacon, but it’s mostly used as a flavouring agent. You don’t need to add salt, because it’s right there in your bacon, oil? nope also brought to you by the joy of bacon. This simple unfussy standby dish, and the many others like it, have a special place in my heart.

Categories
The Project

After a Long Silence…

Things have been very quiet on The Gourmet Project front recently. Now that preparation for, and recovery from our wedding are over with, I’m ready to get back to The Project. We had a spectacular day and a great party with excellent food, free-flowing wine, and a cupcake wedding cake. It’s official, we’re now dining companions for life.

Look for regular updates from here on out.

Categories
Beef, Veal, Pork, and Lamb The Book

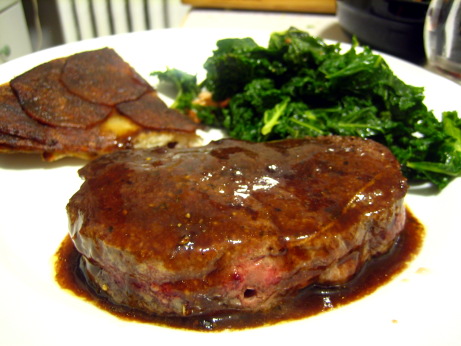
195. Pan-Seared Filet Mignon with Merlot Sauce p.428

Here’s the recipe for the Merlot sauce part of this dish,

This is the second time I’ve made this dish. The first was almost two years ago, when I made it for my dining companion’s birthday dinner. Part of her birthday present was that the steak would be just for her, not for The Project too. That meant I could just cook and serve without the awkward photo session in the kitchen that dishes for The Project require, and I didn’t have to be taking mental notes for a future blog post (but of course I couldn’t help myself). That first time this steak was absolutely fantastic, and I was looking forward to making it again to count it towards The Project.

In this dish filet-mignon is browned in a skillet, then finished in the oven, and served topped with a red wine sauce. The Merlot sauce starts by making a caramel, then dissolving vinegar in the boiling sugar. In another pan onions are softened in butter, and wine, veal stock or demi glace, are added and simmered. The mixture is seasoned, and the solids are strained out. The liquid is added to the caramel, and heated until it’s dissolved. The steaks are served drizzled with the sauce.

The Good: It’s filet mignon with a buttery wine and veal demi-glace sauce, it’s fantastic, if you have any love in your heart for red meat, you will like this dish. The caramel is the surprising part of the sauce, adding sweetness, but also a depth which compliments the browned meat. Filet mignon is all about the so-tender-it-shouldn’t-be-possible texture, and a rich sauce really enhances that. Since it’s a lean cut of meat, the buttery sauce doesn’t put it over the top. Demi-glace is a wonderful wonderful thing, everything it touches just gets better, enhancing flavours, smoothing textures, and bringing the whole sauce together.

The Bad: While the dish was delicious, the technique could have been improved. The steaks are seared in the pan, then roasted to finish cooking through. This builds up a good deal of delicious, wonderful, splendid, magical fond on the bottom of the pan. These browned bits are usually deglazed and used as part of a pan sauce, but this recipe commits the nearly unforgivable sin of just throwing all that goodness out. It also doesn’t ask for any juices that run from the steaks as they rest to be poured into the sauce. That’s just silly. By skipping these steps the sauce can be completely made in advance, which is convenient, but you end up throwing away what could have been the most flavorful part of the dish.

I made a mistake with these steaks and trusted my meat thermometer over my eyes and finger test. I was paranoid about over cooking the steaks (filet mignon overcooks quickly), so I took them out sooner than I should and counted on carryover to finish the job. I radically miscalculated and ended up serving them quite rare. I take my steak rare, and it was a little underdone for me, my dining companion prefers the medium side of medium rare, and it was just not going to happen for her. We were already sitting, and she didn’t want to wait to put it back in the oven, so she nuked it instead. A little part of me dies every time that happens, but it’s a good incentive to get the steaks right the first time.

The Verdict: These were delicious steaks, no question, I’d recommend them to anyone. I think there are a few tweaks that should be made, and it’s certainly not an inexpensive way to do dinner, but if you’re looking for an impressive but not overwhelming dish for a special occasion this is a pretty darn good way to go. The final taste is certainly 5 mushroom worthy, but the travesty of the wasted fond means that I can’t give it full marks.

Categories
The Book Vegetables

194. Pommes Anna p.571


The recipe
This is a ridiculously simple dish, but I still managed to mess it up. It should have been the centerpiece of our meal, but thanks to me it was just an exercise in missed potential. There are only two real ingredients, potatoes and butter, seasoned with salt and pepper. You slice the potatoes on a mandolin as thinly as possible, soak the slices in cold water, then pat them dry. The slices are layered in a buttered ovenproof skillet, and the layers are drizzed with  melted butter, and seasoned. Once all the layers are down the potatoes are covered with a buttered foil disk for the first half of baking, and are uncovered for the final half. When they they’re a gorgeous golden brown you take them out, invert the cake onto a serving dish and cut it into wedges.

The Good: I’ve had pommes anna before, and I can assure that they are very very good, anything wth 1 1/2 sticks of butter to 1 1/2 pounds of potatoes will necessarily be decadent. This is one of those dishes that you can’t help but doing a Julia Child impression while assembling. If it’s done right the potatoes are creamy with just the slightest bit of resistance left to them, it’s almost a confit de pommes de terre. All of the exterior surfaces are browned and crisp like the best potato chip you’ve ever had. It’s a truly decadent dish, and you can’t help but smile when you eat it.

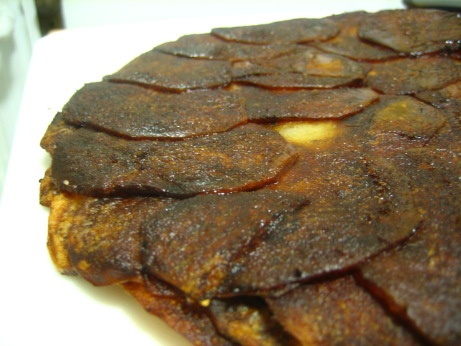
The Bad: My pommes anna were nothing like the ideal I just set out. I followed all the steps correctly, right up until the bit where you take them out of the oven once the’re golden and crisp. I forgot about them for another twenty minutes to half an hour, and they had basically devolved into overcooked potato chips. There was enough butter there to keep it from actually burning, it just tasted very very deeply browned. You might say that potato chips made with butter have something going for them, and honestly it wasn’t terrible, but it wasn’t at all what the recipe was going for.

A huge part of this was my fault, but I was a little surprised at how thinly layered the potatoes were in the first place. The linked recipe calls for a nine inch pan, but The Book’s version spreads the same amount of potato out in a 10 inch pan. Such a thin layer of potatoes is more susceptible to burning, and even at its intended non-dehydrated thickness there wouldn’t have been enough delicious creamy centre to really satisfy me. Yes, the crunchy exterior is everyone’s favorite part, but it’s only special when it’s in ballance with a fair bit of middle. In future I’d consider going even smaller, think 8 inches, to get a satisfyingly thick stack of potatoes.

The Verdict: It’s hard to rate recipes when they’re my failures and not the book’s. The dish I produced wouldn’t early more than a 2, but I think the recipe as written has the potential for greatness. I’m a vindictive guy, so I’m only going to give them a 3.5, but done right they might be a five.