Categories
Frozen Desserts and Sweet Sauces The Book

175. Maple Walnut Ice Cream p.858


The recipe

People asked me what I wanted for Christmas this year, and I told them that my heart’s fondest desire was an ice cream maker. Somehow this struck my extended family as hilarious. My dining companion, who had a lot to do with me getting a Kitchenaid mixer the previous Christmas, understood that I wasn’t joking, and got me the ice cream attachment for said mixer. She saved Christmas.

My mother occasionally made us ice cream as kids, but her machine is hand cranked. After the novelty wore off, the prospect of working that handle for twenty minutes every time we wanted a scoop of vanilla turned out to be more than a mother of three wanted to deal with. Her machine has been sitting safely in the cold room for the past fifteen years. By contrast the Kitchenaid attachment is completely painless. The only difficult thing is to remember to put the mixing bowl in the freezer the day before you want to use it. In my dream house with a second freezer the bowl will just live in there. I don’t want to shill for Kitchenaid, but I love my mixer. If our apartment was burning my first priorities would be to get my dining companion and the cat out, then I’d go back for the mixer.

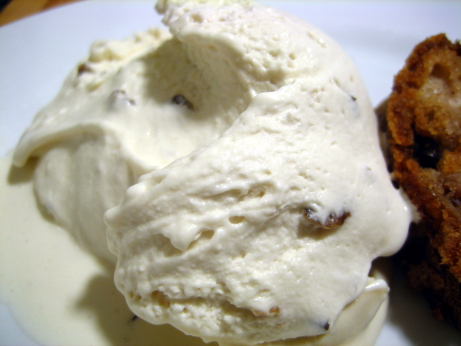
I decided to start my ice cream experimentation with an old favorite, maple walnut. The recipe starts by reducing grade B maple syrup in a pot, then adding heavy cream, milk, and salt and bringing to a boil. Some of that hot syrup mixture is used to temper eggs, then the proto-custard goes back on the heat to thicken. As soon as it’s nappe the mixture is strained and chilled. The custard then goes into the ice cream maker, and when it’s partially frozen chopped toasted walnuts are added. The finished ice cream is still soft so it needs to spend a few hours in the freezer to harden.

This ice cream is incredibly rich, think Häagen-Dazs with some added fat. The ratio of dairy is 2 cups heavy cream to 1 cup whole milk, and that makes for some very creamy, very fatty, ice cream. Usually I’d fully support more fat in ice cream. I get saturated on ice cream very quickly, so that after about six bites I’m finished. I’m completely OK with making those six bites count by making them as decadent as possible. However, when I’ve got 1 1/2 quarts of it sitting in my freezer this insane richness becomes a problem. I fed most of it to guests, but I still had more than my fair share.

The maple and walnut flavours were really well balanced, I don’t like ice cream with too many chunks, and this recipe got the concentration just about right. The maple flavour permeated nicely, but as one epicurious poster suggested a final swirl of partially incorporated maple syrup would have been a nice touch. I’m lucky enough to live in Quebec, where some massive percentage of the world’s maple syrup supply is produced, so finding grade B syrup was as easy as walking to the local grocery store. Unfortunately those of you not living around here may have trouble getting your hands on it. It really is important to get this darker grade of syrup, as it has much more maple flavour. An imperfect substitution is to reduce the more commonly available grade A syrup to 2/3 of it’s original volume (since this recipe calls for reducing a cup of grade B to 3/4 of a cup, just reduce grade A by half). It should go without saying that fake maple syrup, or as we call it sirop de poo-poo, just won’t do.

As a first go with the ice cream maker I’d declare this a success. The flavour and texture were right, and while the richness became overwhelming quickly, those first few bites were lovely. If I didn’t have 40 different types of ice cream to get through, I’d make this one again.
Categories
Food Blogs

And Then There Were Four

The cooking-the-whole-Gourmet-Cookbook trio has become a quartet. Adam, inspired by the recent WSJ article, has started his own version of the project. Cheer him on at Gourmet, all the way.

Best of luck Adam!

Categories
Cookies, Bars, and Confections The Book

174. Chocolate Sambuca Crinkle Cookies p.671


The recipe

This is a polarizing recipe. If the thought of anise and chocolate together piques your interest, you’ll probably like these cookies. If however that sounds like the worst idea you’ve heard all day, you probably won’t. That may sound trite or obvious, but anise is like that. I don’t know anyone who is neutral on the subject of black licorice. People love it, hate it, or have a complex ambivalence towards it. If a recipe is anise scented, you know right off the bat that that’s going to be a dominant element of the recipe’s flavour.

I’m all for anise, I especially like it in savory cooking, I have a little trouble with those super salty licorice candies the Dutch love, but otherwise anise and I are good. When I first flipped through the cookies section of The Book these ones caught my eye, and I’ve been looking forward to making them ever since. I haven’t done them until now because they needed to be served in the right context. My dining companion and I aren’t huge on desserts, so I usually try to serve them when we have friends over, or to bring them places. It’s hard to bring chocolate-anise cookies to a party or dinner, because you know going in that lots of people are going to hate them. I had to wait until I was making batches and batches of cookies, so that they could be one among many elements of a cookie tray.

The cookie recipe is fairly standard. You sift together the flour, baking powder, and salt, melt bittersweet chocolate and butter in a double boiler, and whisk together eggs, walnuts, Sambuca, and sugar. You then add the chocolate and flour mixtures to the egg mixture and combine. You pop the batter in the fridge for two hours, then roll heaping tablespoons of dough into balls, and toss them in confectioner’s sugar before baking.

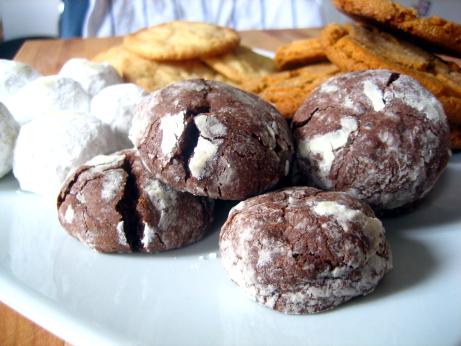
The sugar causes the tops to crack, and I was hoping it was going to give the uncracked parts a nice glaze. As you can see a lot of the sugar stayed in white clumps, which I didn’t find too attractive. The insides of the cookies were soft and cakey, studded with walnuts. As predicted chocolate, and anise were the dominant flavours. I used Pernod instead of Sambuca for this recipe (a Book approved substitution), but I should have remembered that Sambuca is much sweeter than Pernod and compensated.

For people who are into anise cookies, these were quite good. They weren’t the most beautiful cookies I’ve ever produced, but the texture was very nice, and the rich chocolate and anise combination was a winner for me. I try to take other people’s opinions into account when rating these recipes, I usually estimate other’s average ratings, and split the difference between their liking and mine. But we have a bimodal distribution here, and the mean is no longer a meaningful statistic, the mode or the median aren’t much help either. Since this is the food blog part of my life, and not the behavioral neurobiology part, I get to violate good statistical practice, and just ignore all those anise haters.

Categories
Cookies, Bars, and Confections The Book

173. Spice Sugar Cookies p.669

The recipe

My cookie baking bonanza got a little bit confused. I made ginger cookies that didn’t taste much like ginger, and these spice cookies, which are gingerbread in disguise. I kept mixing them up when I told people which cookies where which, it seemed pretty obvious that the crispy cookies which tasted like ginger should have been the ginger crisps, but no. Whatever they’re called, these were among the best gingerbread cookies I’ve ever had.

I’m reading “A History of Food” by Maguelonne Toussaint-Samat right now, so my head is filled with culinary fast facts. Apparently ginger is a recent addition to what we now call gingerbread. In French gingerbread is still called pain d’épice, spice bread, and for most of it’s history was made with whatever spices happened to be available, rarely ginger.

The cookies are a little odd in that they’re made with vegetable shortening instead of butter. I expected that to be a big turn-off, but it really worked. The cookies are made by sifting together the dry ingredients, flour, baking soda, cinnamon, ginger, cloves, and salt, then beating together the shortening and brown sugar, adding an egg and molasses, then gently mixing in the mixture of dry ingredients. The dough then goes into the fridge to chill for an hour, and is rolled into tablespoon balls. The balls are dipped in sugar, and baked sugar side up.

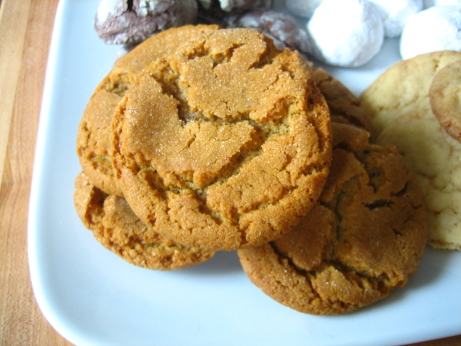
I was really happy with the way these cookies came out, they had a lovely colour, and sparkling sugar topping was very attractive. I liked the way the sugar caused the tops to crack and craze. The shortening really contributed to the texture of the cookies, they were crisp outside, soft inside, and appealingly rich. An acquaintance tried these at a party and said “they’re greasy, I like that”, I can’t think of a better way to put it. Usually greasiness isn’t something I look for in a cookie, but here it really worked. The spice mixture was right on, not overpowering by any means, but delicate and balanced.

These cookies are an absolute keeper. Just looking at the recipe I probably wouldn’t have made these if I wasn’t doing this project, but I’m certainly glad I did.

Categories
Cookies, Bars, and Confections The Book

172. Brown Sugar-Ginger Crisps p.665


The recipe

I made these cookies in the middle of a cookie-baking frenzy, I was buying ingredients for about five different types, with a couple of backup shopping lists in case I couldn’t find all the stuff for the first tier cookies. Somehow the crystallized ginger that this recipe called for never made it into the basket. I discovered this once I was home and ready to start baking, and just not at all interested in going out to hunt down crystallized ginger. I’m an industrious guy, I figured I could crystallize my very own ginger. I looked up a few recipes on the web (The Book doesn’t have one) and it didn’t seem too difficult, although the recipes were very inconsistent. Some called for boiling chopped ginger in a sugar syrup for about 20 minutes, some asked you to boil the ginger in syrup for an hour, let it steep in the sryrup for a day, boil it for another hour, and to repeat this process every day for a week. Since I was interested in using this ginger for cookies that very afternoon I went for a middle ground and chopped the ginger very finely, and boiled it in a concentrated syrup for 2 hours. It was no where near as good as the store bought kind, quite ugly, and very hard, but it basically tasted like candied ginger. No one else was much interested in my crystallized gingers, but they were my little treat, I loved them with a cup of coffee in the afternoon.

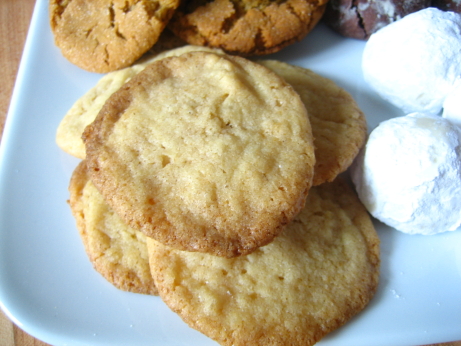
The ginger did a serviceable job in these cookies. They’re a fairly standard cookie base of butter, brown sugar, egg yolk, and vanilla creamed together, crystalized and ground ginger mixed in, and a mixture of flour, baking powder, and salt gently stirred in. They came out as very thin and crisp cookies, studded with the ginger chunks. “Real” crystallized ginger is soft and pliable, whereas my improvised version was quite tough. On the first day they were baked they had a nice crispy exterior with a chewier interior. The recipe says they keep at room temperature for a week, but I found that they lost their crispness overnight. I really would have preferred the chewiness of the professionally produced product in the cookies. Other than that they were nice, they didn’t blow me away, and I probably wouldn’t have asked for a recipe if they’d been served to me, but they were perfectly good.

A strange thing about these ginger cookies is that they weren’t particularly gingery. Beyond the crystallized ginger there’s only 1/4 teaspoon of ground ginger in the recipe. If I made them again I’d up that to 1 teaspoon, many of the Epicurious posters suggest that it improves the cookies dramatically. As written this recipe makes a nice buttery cookie, with a hint of ginger flavour and chewy bites of crystallized ginger. It’s possible that I missed out on what this recipe had to offer with my sub-standard ginger, as they were I liked them well enough, but wouldn’t go out of my way to make them again.

Categories
Cookies, Bars, and Confections The Book

171. Mexican Tea Cakes p.673


The recipe

While there’s nothing particularly Mexican about these tea cakes, they’re an international favorite for good reason. I’ve always heard these cookies called Russian Tea Cakes, and they mostly seem to be made by older eastern European women at bake sales and Christmas fairs. As children, these were the cookies that we ignored on the big cookie platter, preferring the triple chocolate and jam puddle options. Conveniently the adults in the room weren’t too interested in those ultra sweet and sticky confections, and seemed to prefer the tea cakes. I didn’t get it, the nuts made them taste suspiciously healthy, and they were far too dry. Now nut based cookies are some of my favorites, and I realize what a joy dry cookies are with tea or coffee.

The cookies take a little bit of forethought, but they’re well worth it. You start by making the dough (cream together butter and confectioners sugar, add vanilla, flour, finely chopped pecans, and salt, mix until just combined), and refrigerating it for 6 hours. You then roll the dough into balls, and bake. The hot cookies go directly from the baking sheet to a bowl  of confectioners sugar. The heat of the cookies melts the sugar and ices them for you. Once the cookies have had a chance to cool they go back to the sugar bowl to get a final layer of powdered sugar.

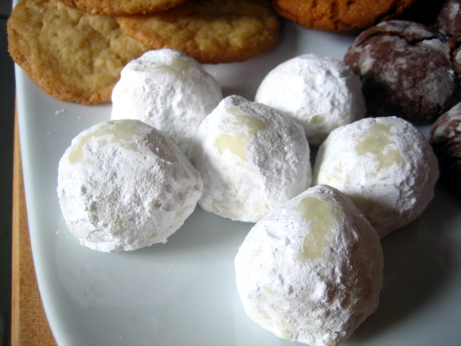
By far the best thing about these cookies is that they keep forever. The recipe says they keep at room temperature for up to three weeks, but I kept mine for more than a month and the last one was almost as good as the first. The pecans are both the prominent flavour and texture of these cookies, and that’s a very good thing. They’re quite dry and a bit crumbly, but their sugar coating keeps them from completely drying out or becoming brittle.

Before making this recipe I’d never realized how cookies like this got so evenly glazed, the hot cookies in sugar method was a real revelation for me. I’m adding these cookies to my repertoire. They’re delicious but not at all showy, can be made well in advance, they work year round, and they  fill out a cookie tray nicely. Having cookies like these in your arsenal is a very smart move.

Categories
Breakfast and Brunch The Book

170. Tomato, Garlic, and Potato Frittata p.632


The recipe
The Book’s blurb before the recipe suggests that this dish is equally good as a breakfast dish, or for dinner. I’m not convinced that it belongs in the breakfast section at all. I wanted to make a fritatta as a simple way of doing eggs for a crowd, but this dish is actually more of a potato pancake bound together with eggs. I’m a great fan of fritattas because they’re so hands off. I use them as a fridge cleanup device. On a Saturday morning we’ll make coffee, and haul all the tags ends of vegetables out of the crisper, chop them up and brown them in a cast iron pan. While they’re frying we go over the weeks leftovers, and see what can bulk up the fritatta, if we find leftover steak we celebrate, leftover chili makes it a Mexican fritata, and potatoes are an especially prized find. I tried adding leftover rice, but it wasn’t too successful. Once anything and everything is in the pan, I pour a few beaten eggs over top, and leave the pan on the burner for about a minute. I then sprinkle some grated cheese over the still liquid eggs, and pop in in the oven under the broiler for about three minutes. Once the cheese is browned and bubbling I take it out. Like a quiche the centre should still be a bit wobbly as it will continue to cook with the residual heat in the pan. The fritatta is a standby improvised dish for us, but the proportion of eggs to other stuff is a constant. I fight with my impulse to use up all the leftovers, because an overloaded frittata is just no good.

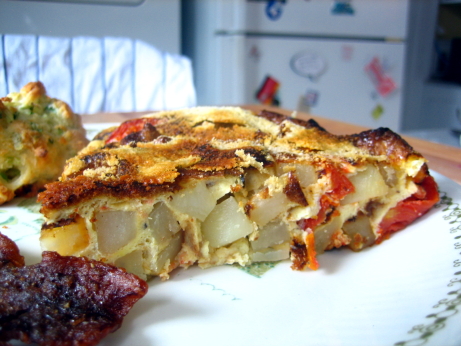
This particular frittata starts by making a mixture of eggs and egg whites, Parmigiano-Reggiano, sliced basil, salt, and pepper. You then lightly brown garlic in a skillet, remove it, and soften diced potatoes in the pan. The potatoes come out, and tiny grape tomatoes are browned until their skins split. Then the potatoes and garlic added back in, and the egg mixture is poured overtop. The eggs cook for 3 minutes uncovered, and 5 mintues covered on top of the stove, then gets put under the broiler for 5 minutes more. Parmesan is sprinkled on top, and put back under the broiler to brown for 2 or 3 minutes more. Then in a nerve wracking move you slide the fritata onto a serving place, and slice it into wedges.

For those of you who are counting, the fritata cooked for 15-16 minutes. My standard fritata is nicely set after 5, not surprisingly the eggs in this dish were overdone and dry.  I misread the instructions, and sprinked the cheese on top before it went under the broiler for the first time, so the parmesan was overdone by the time I took it out, but that’s my fault. My main complaint was the proportions though, by weight there was as much potato and tomato as egg in this recipe, and I was really looking forward to a much eggier dish.

I think the basic concept of this frittata is solid, but I wasn’t thrilled with the excecution. The potato-garlic-tomato-basil flavour combination is a good one. My ideal version of this dish would use more eggs, cook them less, mix up the cheeses (think goat), add fresh basil on top, and cut the potatoes into larger chunks so that they could be browned before going into the fritatta. To me the frittata is a casual and convenient dish, and this version was a bit too overwrought for my tastes, the ingredients in the pan, ingredients out of the pan dance was more effort than I’m willing to put into what should be a very straightforward breakfast. My standby whatever-you-have-on-hand fritatta is much simpler, and ends up tasting better than this one does, so I’ll give it a miss next Saturday morning.

Categories
Breakfast and Brunch The Book

169. Sweet and Spicy Bacon p.656


The recipe

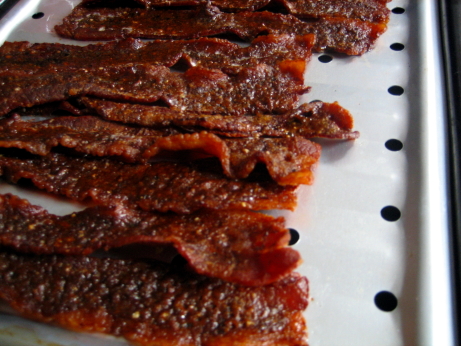
The food blog world has been swamped with recipes for caramelized bacon with a kick, so I decided that now would be a good time to see what all the fuss was about. After trying this recipe I’ve decided it’s just a gimmick, and not a worthy treatment of bacon. I get the concept, and can see the appeal, a dish that’s simultaneously sweet, smoky, salty, and spicy could be the holy grail of addictive breakfast treats. Alas, that’s not how this dish turned out.

The method is simple, but just because it’s easy to do a thing, doesn’t mean you should. You cook thick-cut bacon on a broiling rack in a 350 oven for 20 minutes, flip it over, and spread on a mixture of brown sugar, cayenne, and black pepper, then continue baking for another 15-20 minutes.

In re-reading this recipe I realize I missed the whole thick-cut bacon instruction, and used the normal stuff. That meant that my cooking time was significantly shorter, and I had proportionally more of the sugar-spice mixture than the recipe intended. Consequently my bacon was sweeter and spicier than it should have been. I think I’ve decided that any amount of sugar and spice on my bacon is too much. The flavour wasn’t bad precisely, it still tasted like bacon, but my palate had to filter out distracting brown sugar and cayenne flavours to get to it. Most of my guests thought it was sort of OK, but one just hated it, I think he found this dish personally offensive.

If there’s one thing the internet doesn’t need it’s another ode to bacon, but it’s pretty well understood that bacon is near perfect all on its own. You can use it to make other dishes better, but trying to improve the bacon itself is a fool’s errand.

Categories
Food Blogs The Project

The Gourmet Project in The Wall Street Journal

Extra Extra! There’s an article about cook-though blogs like this one in today’s Wall Street Journal. There’s even a quote from me in there. This is the first mainstream media attention The Project has attracted, and I’m honoured to have it come from such a prestigious publication. You can access the article through the WSJ website, there’s also a page of links with excerpts from the cook-through blogs profiled. I discovered a bunch of amazing new blogs, it’s well worth a look.

Categories
Breads and Crackers The Book

168. Cheddar Scallion Drop Biscuits p.597

The recipe

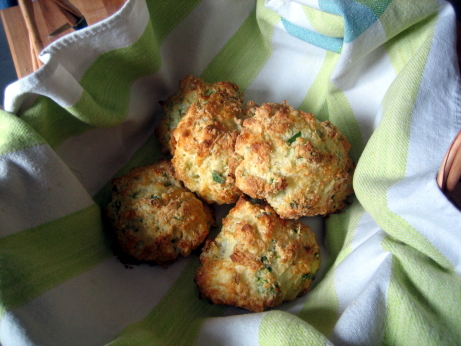
The Boys were over for breakfast, and I decided to make them biscuits. One of them has been living down in the Carolinas for the last few years, and has become something of a biscuit connoisseur, so I didn’t dare try a traditional buttermilk biscuit. These are far simpler, and less error prone. It’s a basic biscuit dough (flour, baking powder, baking soda, salt, butter, buttermilk) with a bit of sugar, cheddar cheese and scallions mixed in. These aren’t kneaded or shaped which when done wrong can toughen the biscuits, they’re not cut out so there’s no risk of collapsing the flaky layers, and there aren’t twenty generations of ancestors looking over your shoulder to make sure you do it exactly right. You just blend butter into the dry ingredients, stir in the cheese and scallions, and barely mix in the buttermilk (gluten is still your enemy). The biscuits get unceremoniously dropped onto a baking sheet, and stuck in the oven.

As Epicurious posters have noted, the cooking time is off, at 450 these will be burned after the recommended 18-20 minutes, I started smelling a hint of char from the bottoms after 14-15 mintues. so don’t get too far from the oven, and use your nose.

They tasted a lot like the biscuits at Red Lobster. I don’t think I’ve been to a Red Lobster since 1998, but the taste of their biscuits is stuck in my food memory. They’re less over the top greasy (which unfortunately means not quite as good), in fact they’re a little dry. A bunch of the Epicurious posters recommended adding more buttermilk, and I think I’d go with that suggestion next time. The cheese flavour is prominent in these biscuits, I used some middle of the road aged cheddar, but I’d definitely choose the oldest sharpest stuff I could get my hands on next time, the cheese is the make or break ingredient, so choose it wisely. I really liked the addition of scallions, the onion flavour wasn’t overwhelming, or un-breakfasty, just delicious. The exteriors of these biscuits were glossy and crispy, and while the insides were a bit dry once they’d cooled, they were lovely and tender when warm. The solution is obviously never to let these cool down.

These biscuits were a success, they’re fairly idiot proof, so I can handle making them before the espresso machine has heated up. The ingredients are mostly things you’ll have on hand (or maybe normal people don’t absolutely always have scallions in the fridge, but that’s just semantics), they taste good, and look pretty. While the recipe has a few problems, with a couple modification I think they could be a breakfast standby.