Categories
Pies, Tarts, and Pastries The Book

123. Sweet Pastry Dough p.791


The recipe

I should state at the outset that I’m a pastry neophyte. Before I started The Project, I think I’d made two pies in my life. Sure, I baked stuff in pie shells, but I always picked up the Tenderflake pre-made ones, and figured it was good enough. I don’t really have a knack for pastry, but I’m working on it. This is the inaugural entry for the Pies, Tarts, and Pastries chapter of The Book, so hopefully my pastry skills will improve as I work my way through it.

This pie dough is a sweetened and butter based. It gets used in all sorts of other recipes in The Book. I definitely prefer a sweetened dough for dessert pies and tarts. My mother is a rolling pin virtuoso whose pies always turn out perfectly, but she uses the same lard based dough for all her recipes. We have tourtière (a spiced meat pie) every Christmas, which I adore. I particularly like the way the crust is infused with the meaty filling’s flavour. However, when summer comes around and she starts baking up fruit pies using the same dough, I can’t help but imagining the taste of the meat filling along with the crust. Tourtière innards and strawberries aren’t destined to be the next great taste sensation. She recently started adding sugar to her dough for sweet pies, and it made a world of difference. Somehow a little sugar gets rid of the yuletide association, and the pies become pure summer.

The ingredients and method for this dough are pretty standard, combine flour, sugar, and salt, then blend butter in until you’ve got pea sized lumps in a sandy mixture. Then egg yolk and a bit of water are incorporated, until the dough barely holds together. The dough is then divided up, smeared once with your palm, and refrigerated for an hour.

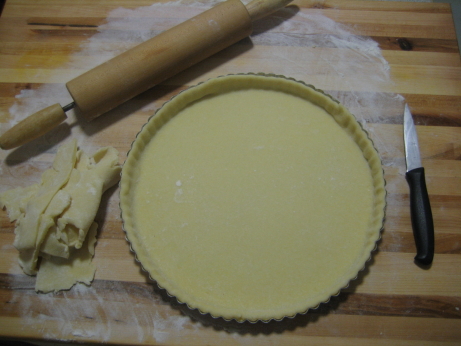
I had some trouble with rolling this dough out. I’ve made it twice, the photo above is the most recent attempt. You can see the scraps to the left, which were probably 40% of the pie dough. I had a really tough time getting it to roll out evenly, and small cracks at the edges developed into big fissures as I was rolling. It was actually fairly easy to work with, and I think my problems were a matter of technique rather than the recipe. The first time I made it was much more of a fiasco though. I made it in late August, on a day with 95% humidity, and it didn’t go so well. Here’s a photo of the crust after baking. 123_sweet_pastry_dough_p791_bad_attempt.jpgYou can see that I had to do a lot of patching before I even got the dough into the oven, and small cracks I’d missed developed into chasms once baked.
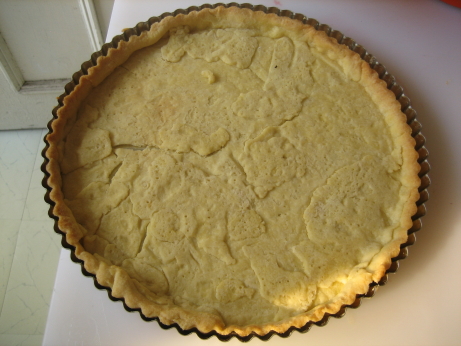
The flavour of the dough is excellent, but the texture isn’t ideal. Butter doughs are usually tender, but not flaky. Using a mixture of lard or shortening with butter should give a flavourful dough with great texture. The Book’s Basic Pastry Dough takes this approach (without sugar), and I’m looking forward to trying it. This dough was perfectly fine, it tasted good, and the texture was totally acceptable, but I don’t think it’s the definitive sweet pastry dough. Perhaps as I make and remake it for all the recipes that call for it I’ll get the technique down. For now it’s very serviceable, and I’m content to keep using it.
Categories
Breads and Crackers The Book

113. Rosemary Focaccia p.606


The recipe is the same as this one, but linked recipe forgets to list the water and salt for the dough in the ingredient list (they are in the recipe description).

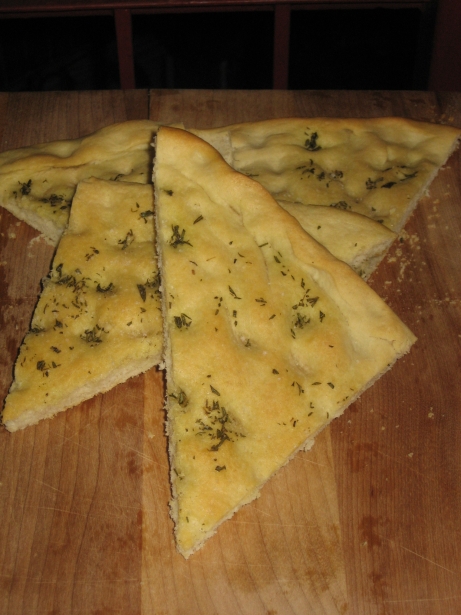
I should start off by saying that this was absolutely delicious. It didn’t rely on rare ingredients or novel taste experiences to get there. It went with the straightforward combination of fresh baked bread, so much olive oil that drizzling is not an option, and enough salt to make it crunchy. This is the same tried and true combination that keeps the deep-dish pizza places of the world in business. You know that this is a Gourmet recipe and not a special from Pizza Hut because the focaccia doesn’t have a ring of cheese baked into the crust.

The recipe starts with a simple yeast dough, with some olive oil added in. It’s mostly kneaded in a stand mixer, then finished kneading by hand. Once the dough is coated in more oil and it’s been left to rise for 1 1/2 hours, it’s pressed into a baking sheet, covered with plastic wrap, and allowed a second rise. Obviously this second rise requires the addition of more oil, but this time it’s used to lubricate the baking sheet and plastic wrap. After the second rise it’s time for, you guessed it, more oil. This time the oil is mixed with chopped rosemary, and poured over the bread. There is so much oil at this point that the recipe directs you to make indentations in the bread for the oil to pool. Then the bread is sprinkled with sea salt, and baked at 425 ’till it’s golden. When it’s ready the bread needs to be inverted to get it out of the baking sheet. I’d do this over some paper towel because even the absorbent power of bread is overwhelmed by the amount of oil in this dish.

The focaccia was excellent, the bread was moist, with some chewiness, but a nice crumb and texture. The crust, both top and bottom, were wonderfully golden. The rosemary was fantastic, and really allowed to shine as the sole aromatic. If you serve this to friends they’ll beg you for the recipe, don’t give it to them. It would be like telling a kid about Santa. The bread doesn’t hold up well overnight. It’s not great cold, microwaving killed everything good about it, and rewarming in the oven didn’t to it justice. It’s best to get a crowd together and polish the whole thing off in one go.

The recipe uses a truly unconscionable amount of olive oil. The ingredient list calls for just under 1/2 a cup (7 tablespoons) of oil, to 5 cups of flour. But that doesn’t count the “generous” lubrication of the dough ball during the fist rise, or the baking sheet and plastic wrap during the second. I suspect the total is closer to 3/4 of a cup. That’s 1400 calories at 120 cal/tablespoon. We had the focaccia along with yesterday’s kale and chroizo soup for dinner, and certainly didn’t feel like we’d eaten lightly.

Categories
Beef, Veal, Pork, and Lamb The Book

99. Chinese-Hawaiian “Barbecued” Ribs p.491

The recipe

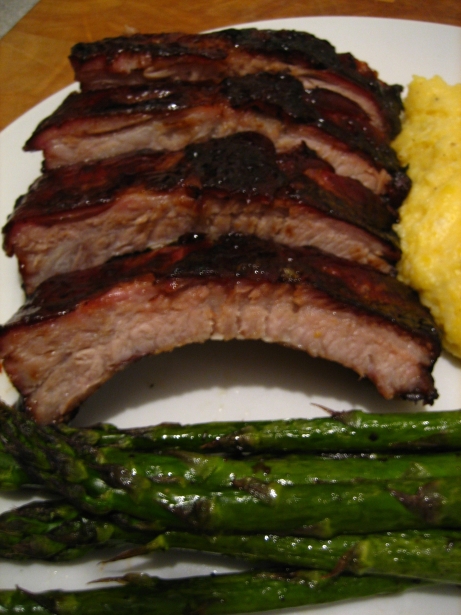
I wasn’t sure I was going to like these ribs, but I was pleasantly surprised. These are racks of ribs marinated in soy, sugar, ketchup, sherry, salt, garlic and ginger. They’re then baked at 325 for 1 3/4 hours, basting with the marinade every 20 minutes. Everything about the title is confusing, I get the Chinese part of the name, soy + ginger + garlic = Chinese, fine. But Hawaiian? Is it the ketchup that makes it Hawaiian? The blurb says the recipe came from a Hawaiian restaurant, but if they’d come from a Sweedish restaurant would they be Chinese-Sweedish ribs? Chinese-Hawaiian doesn’t really tell me a lot about what they’re going to taste like. “Barbecued” is another misnomer, quotation marks don’t turn barbecue into baking. Yes they’re low and slow, but where there’s no smoke there’s no barbecue.

I’m usually pretty relaxed about health and safety standards when I’m cooking. I’m happy to eat raw eggs, tartars and carpaccios, and if some leftovers have sat out longer than they should have I’m probably still going to eat them for lunch the next day. One aspect of this recipe gave me pause though. The ribs are marinated, then the marinade is used to baste the ribs while they’re in the oven. Using a marinade as a basting liquid or a glaze is often a delicious way of making the most of your marinade. Usually the marinade is brought to a boil before it does double duty as a glaze though. Not here, the only safety precaution the recipe mentions is to apply the last coating of glaze 10 minutes before you take it out of the oven. Maybe 10 minutes at 325 is enough to kill any nasties that have been growing in the raw meat juice marinade sitting out for nearly two hours… maybe. I followed the directions, and nothing bad happened. But it seems like bringing the marinade to a boil for a few minutes would make the whole operation a lot safer and not take a lot more effort.

The ribs themselves were surprisingly good. I was only able to marinade them for about 1 1/2 hours, instead of 3, but that didn’t seem to hurt anything. All the sugar in the marinade made for a thick caramelized coating, and the long cooking time almost gave them the falling off the bone tender texture of real barbecue. The glaze was thick enough to seal all the juices inside the ribs, so they stayed nice and moist. The glaze was a bit intense for my taste, it was really really salty and sweet. It could have used something to cut that. Normally some acid would be added to give the glaze some tang, or some chilies would spice things up. I find those flavours can balance the salty-sweet, whereas the ginger and garlic here weren’t really able to get the job done. I thought they were tasty, but too intense and unbalanced. My first few bites were delicious but after a couple of ribs it was getting to be too much.

I liked the baked and glazed ribs concept a lot. In future I would play around with the glaze, and try to keep the flavours in equilibrium. Low sodium soy might be an improvement, and cutting the sugar wouldn’t be a bad idea. The baking “barbecue” worked out well, it’s a pretty good substitute for those of use who don’t have a pit in the back yard. I’m still unclear how they were Hawaiian, but they were good.

Categories
Breakfast and Brunch The Book

92. Baked Eggs and Mushrooms in Ham Cups p.634

The recipe

The eggs are really pretty, taste great, and come in manageable individual sized portions. It’s not really practical to do fried eggs for a crowd, you end up spending all your time at the stove, and the toast gets cold. The solution is often scrambled, or poached eggs. Scrambled are nice, but a bit boring, and I really like having a yolk to dip into. Poached are great, and as my poaching skills improve I appreciate it more and more. I’m always worried about getting the eggs out of the pan, nicely drained, and onto the plate without breaking at least one of them though.

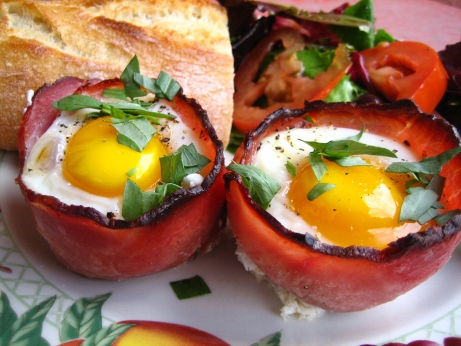
This type of dish is a nice option for a big brunch. Slices of ham are fitted into muffin cups, and filled with a mixture of sautéed mushrooms and shallots, fresh tarragon, and crème fraîche. Each cup is topped with an egg, and then popped in the oven at 400 degrees until the whites are set. They’re excellent little self-contained dishes that are easy to serve, and most of the work can be done ahead. They’re easy to make, the presentation is impressive, and quite charming.

I was a big fan of the flavours at work here. The ham crisped up and showed off its bacony side, which paired well with the classic mushroom tarragon combination. The crème fraîche added a bit of richness and luxury, and the egg was a none to subtle reminder that this was a breakfast dish.

Despite my enthusiasm, the recipe had some technical problems. When buying the ham for this recipe it’s important to get slices without any holes, otherwise the filling will leak out. I decided that thicker slices should stay together better, but I failed to consider that they’re less malleable. I had trouble getting them into the egg cups, and ended up cracking some of them. In the end, a lot of the filling did run out of them. This isn’t really the recipe’s fault, after all it did warn me. But your ham should be neither too thick nor too thin, and the more uniform it is the better.

The real problem with the recipe came in the baking of the eggs. I put them in the oven for the recommended 15 minutes, but the whites weren’t even close to being set. It took an extra 10 minutes for them to set up. Unfortunately the yolks were fully set by that point, which was a real letdown. It’s possible that the broiler element came on at some point during the eggs’ cooking and applied too much direct heat from the top. Since you don’t really care if the eggs steam a bit, you could probably cover the muffin tin in the oven.

I’m not sure where I went wrong with the eggs, Teena at the other gourmet project made these recently. She didn’t seem to like them nearly as much as I did, but the eggs in her photo look like they have set whites and runny yolks. I may have messed up somewhere along the line.

These eggs looked and tasted great, and were really easy to make. Mine didn’t work out as well as they could have, but they were still delicious. Tarragon is a prominent flavour here, and not one you often find in breakfast dishes. For me that was a welcome surprise, I’m always happy to eat more tarragon. It doesn’t really jump to mind when you think of flavours to pair with coffee and orange juice though. I think these eggs work best as part of a less breakfasty brunch. I served them with baguette and a green salad, which worked really well. I’m excited to try these again, if I can find a way to maintain my ham’s structural containment and sort the eggs out, I think this dish could be a real winner.

Categories
Cookies, Bars, and Confections The Book

83. Oatmeal Cookies p.664

The recipe

People are funny about baking. Not everyone, but probably a majority of people who “don’t bake” would at least be willing to try their hand at making oatmeal cookies. When their 5 year olds help bake, they make cookies. These are the same people who will look at you funny if you tell them you’re making biscotti, they think shortbread is too complicated, and are convinced that brownies and cakes only come from a box mix. It must be an issue of familiarity and comfort, but in reality making good cookies is often harder than any of those other baking projects. The skills are the same, sifting, creaming, beating, cracking eggs, the order is just a bit different. Cookies are notorious for burning, and cooking unevenly. Pans have got to be rotated, and racks switched. This is not to say that baking cookies is hard, just that there are many many baking projects which people won’t try because they lack the confidence. Since everyone can bake a cookie, it’s a chink in their armour, and a lead in to more unfamiliar projects. It’s possible that all of these straw men I’ve set up know perfectly well that they could bake other things if they wanted to, but feel it’s just too much effort. Fresh warm cookies are pretty much universally agreed to be worth working for.

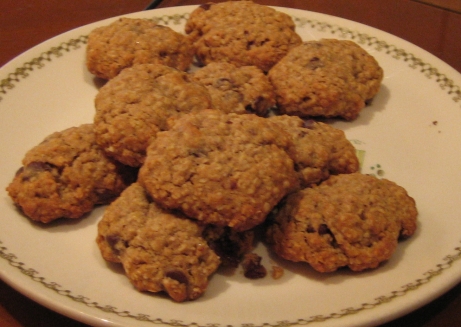
These particular oatmeal cookies are fairly standard issue, a bit rough around the edges, but in a very satisfying way. These are about as casual as cookies get, standard butter cookies spiced up with rolled oats, cinnamon, vanilla, and brown sugar. Chocolate chips are given as an optional addition, so I stirred in half a cup. Sift the dry stuff together, cream the wet stuff together, then mix the two doing your best not to create gluten. Bake at 375 for 12 minutes, and contemplate just accepting the second degree burns to your mouth while you wait for them to cool.

If you’ve had an oatmeal cookie before you know what to expect with these. When I’m in the mood for an oatmeal cookie, familiarity is what I’m after though. They’re miles better than the cracker crisp packaged ones, and the oily and inexplicably huge cafeteria cookies. The cinnamon and vanilla come through nicely, and the use of both white and brown sugar adds a bit of molasses depth. The rolled oats let you pretend they’re healthy, but the added chocolate chips give away the lie. This is my standard go-to oatmeal cookie recipe, I probably make them four times a year, and I love them every singe time. Just make sure to have a glass of milk on hand.

Categories
Cakes The Book

78. Ginger Pound Cake p.704

no recipe for this one.

I served substantial pieces of this pound cake following our Beef Wellington supper. If that sounds like a ridiculously rich follow-up to one of the heavier items of the British cookbook, you’re absolutely right. I served both the cake and the Wellington to one of The Boys and his lady friend. The last time they had us over they tried to plumb the depths of the English butter first cooking philosophy. Their opening volley was rabbit braised in a butter sauce, and asparagus gently floating in a butter pond. When we had them over, what could we do but wrap meat in pastry, and try to get as much butter into a cake as is humanly possible? The next round of this escalating war on our arteries has been planned, and intercepted intelligence indicates he’s got a duck wrapped in bacon, possibly stuffed with a rabbit ready to deploy.

This is quite a large cake, it fills a 10 inch tube pan and ends up about 6 inches tall. You really need a crowd to get through it, because as much as you might want to you’ll only be able to eat a little. The traditional proportions for a pound cake are a pound of flour, a pound of butter, and a pound of sugar, hence the name. This recipe does indeed include a pound of butter, a bit more than a pound of cake flour (at 4.6 oz / sifted cup), and a pound and a half of sugar (at 8 oz / cup) add six eggs into the mix, and you’ve got an appropriate retort to the buttered rabbit. Those proportions should tell you what you need to know about this cake. It was decidedly buttery, and a bit too sweet. In this case the more than traditional sugar level had a very good reason. When they call this a ginger pound cake they’re not fooling around. The recipe starts with 6 oz of grated fresh ginger, and they give explicit instructions about preserving every precious drop of ginger juice. Just to punch it up a bit they call for one and a half teaspoons of dried powdered ginger as well. The main flavour of the cake is not at all subtle.

Actually making the cake was very easy. I used my stand mixer, while the recipe calls for a hand mixer. There was a lot of creaming of butter and sugar to do, so I’d say go with the stand mixer if you have one. The method was straightforward, sift the dry stuff together, then cream the butter and sugar, stir in the ginger, and add the flour mixture and milk in alternating batches. This cake is already pretty dense, so building gluten would be a very bad thing. The recipe calls for cake flour, which is less prone to gluten formation, but it’s quite important to mix the flour in slowly and as little as possible. The standard recipe phrase “mix until just combined” really means until it doesn’t quite look combined and there are still some little chunks of flour, but it no longer looks like a swirled lollipop. The batter goes into a buttered and floured tube ban, and baked at 300 for up to an hour and a half.

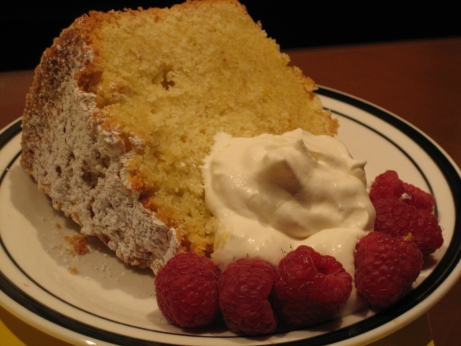
The final cake was rich and dense, but managed to have a really excellent crumb. I was quite surprised by how good the texture was. Many pound cakes end up having a uniform, tiny, dense packed crumb. In this version there was a lot more texture, it gave the appearance of a much lighter cake, but had the mouth filling feel of the rich beast it truly is. The ginger in it’s various forms came through loud an clear. The sweetness of the cake mellowed its spiciness, and recalled the heavenly balance of candied ginger (if anyone wants to get me a Christmas present, a box wouldn’t go amiss). I served it with raspberries and whipped cream. The berries were a nice contrast, but honestly enough is enough with the dairy. I prefer a fruit coulis with a pound cake, but I guess with everything going on in this cake it would have been overkill.

I was really happy with the way this cake turned out. The texture was excellent, and the flavour was just what I’d hoped for. This cake would be best served at a function, or a pot-luck. You’ll never get enough people around one table to eat it all.

Categories
Beef, Veal, Pork, and Lamb The Book

75. Sour Cream Pastry Dough p.419

The recipe

This is the crust for Twenty-First Century Beef Wellington. It’s folded over a browned beef tenderloin, covered in Cilantro Walnut Filling, and baked. It’s a very simple dough, made with flour, butter, sour cream and a dash of salt. It’s brought together, then smeared to distribute the fat, and chilled for a couple of hours before rolling.

The dough was exceptionally strong before baking, it put up with a lot of folding, and pinching, and crimping, without tearing or stretching out too much. It rolled out easily, and stood up to the fillings during baking. Between the filling and the meat juices this dough was asked to encase a lot of liquid, and it did an admirable job. Not a drop leaked out, and the bottom of the crust remained crisp.

The final texture was flaky on the outside, and rich and moist on the inside. The sour cream gave it a bit of a bite, which I really appreciated. I was thoroughly impressed with how beautifully it browned up. The central problem of beef wellington is arranging things so that the pastry is nicely browned at the same time as the meat is medium rare. I took the wellington out when the beef was done, and just hoped for the best on the crust. As it happens I turned my back for a bit too long and ended up closer to medium than medium rare on the beef, but the crust was absolutely perfect.

The crust was probably my favorite part of the final wellington recipe. It tied the flavours of the meat and filling together, and had a wonderful crisp – tender texture. You could replace the tenderloin and filling with all sorts of things in this recipe. The dough would be great filled with vegetables, or fish. It would also be a delightful dough for a savory pie. Maybe I’ll use it for a tourtiere at Christmas.

Categories
Cookies, Bars, and Confections The Book

49. Lemon Bars p.691

No recipe for this one. But they were so good I can’t help but giving you the recipe and them a five mushroom rating.

FOR CRUST
2 cups all purpose flour
1/2 cup granulated sugar
1/2 teaspoon salt
1 1/2 sticks cold unsalted butter, cut into 1/2 inch pieces

FOR FILLING
3 large eggs
1/2 cup granulated sugar
2 tablespoons all-purpose flour
2 tablespoons heavy cream
1 teaspoon finely grated lemon zest
1/4 cup fresh lemon juice
1/8 teaspoon salt

Confectioners’ sugar for sprinkling

MAKE THE CRUST: Put a rack in middle of oven and preheat oven to 350F.
Pulse together four, sugar, and salt in a food processor just until combined. Add butter and pulse until mixture resembles coarse meal. Press dough onto bottom of an ungreased 9-inch square baking pan. Bake until golden brown, about 20 minutes.

MEANWHILE, MAKE THE FILLING: Whisk together eggs, granulated sugar, flour, heavy cream, zest, juice, and salt in a bowl until combined.

BAKE THE BARS: When crust is baked, rewhisk lemon mixture and pour onto hot crust. Bake until just set, about 16 minutes. Transfer pan to a rack to cool.

Refrigerate bars, covered, until cold, at least 4 hours. Before serving, cut into bars and sprinkle with a thick layer of confectioners’ sugar.

I’m sure we’ve all eaten a million lemon bars, some insipid, some inspired. We all know the bad ones with their mushy oily crusts, and super sweet lemon topping that’s either sloppy pudding, or a Fruit Roll-Up. Worse is the health-food version with a cardboard dry crust that crumbles if you look at it, and artificial sweeteners. My ideal lemon bar is built on really good shortbread, where good quality fresh butter is a must. The topping should be a sweet-tart just set lemon custard that’s thick enough to stay in place but avoid gumminess at all costs.

This bar lived up to that ideal quite nicely. All of the shortbread recipes in The Book seem to come out beautifully, and this one was no exception. The lemon topping balanced the tart acid of the lemons with just enough sugar, and added zip to the smooth egg and cream custard. Add a bit of powdered sugar and it was good to to.

In making this recipe I learned the value of measuring your baking dish. It calls for a 9 inch square, and I grabbed something significantly larger without thinking it though. I spread the shortbread out on one half of the pan and baked it. When it came time to pour the liquid custard on top of it I realized I had a problem. I attempted to rig up a shield wall out of aluminum foil to keep the filling on the shortbread, but my wall breached during baking. I ended up with a deep pool of filling on one side of the sheet pan, and much less filling on the shortbread than I would have liked. It was still totally delicious with half the filling, and I can only imagine that it would have been better had I not messed up.

Lemon bars, you’re the second recipe in a row to earn your five mushroom rating. Kudos.

Categories
Hors D'Oeuvres & First Courses The Book

19. Gougères p. 33


very much like this recipe, except The Book omits the dill seeds, and adds two tablespoons of grated Parmigiano-Reggiano, and one teaspoon of nutmeg.

This one went quite well. They were fluffy and airy without being greasy. The cheese flavours were definitely there, but not overwhelming. The nutmeg was a nice touch.

Making them was quick and easy. When I added the flour to the liquids it seized into a near solid mass almost instantly, and it took a lot of stirring to get it to the right consistancy. Other than that it wasn’t much trouble. The recipe suggests piping the gougères onto a sheet pan from a pastry bag, or just using a teaspoon. I didn’t have a bag, so I went with the spoon. The batter is very sticky, so piping them would have been a bit easier, but it wasn’t a big deal. Mine were also finished baking in ~15 minutes, while the recipe suggests they should take ~30. I recently got an oven thermometer, and it turns out my oven ends up ~25 degrees hotter than the dial suggests. This might explain the reduced baking time.

These were really tasty, and a great two-bite size. Be warned, you could very easily eat twelve of these without really noticing.

Categories
The Book Vegetables

5. Roasted French Fries p. 568

Epicurious doesn’t have a recipe to link to for this one. But since this is hardly a recipe at all we won’t worry too much. I cut three large baking potatoes (skins on) into wedges about 1/3 of an inch wide, tossed with vegetable oil, salt, and pepper and transfered them to a baking sheet. I baked at 500 for 25 minutes flipping once.

These were nearly as good as their fried cousins, and I didn’t have liters of hot oil on my stove. The last time I tried frying at home I used a cheap fry thermometer and let the oil temp get away from me. When the fries went in, the oil boiled over the sides of my pot and half of my kitchen turned into a fireball. Hours spent cleaning a slurry of extinguisher powder and oil out of my stove has given me a healthy sense of respect for home frying. Worse, even when done successfully in as well ventilated an area as an apartment kitchen can be, you and all your clothes still end up smelling like french fries.

The results of this baked version were different, the potato skins not quite as crispy, but not as oily either. The cleanup was a snap, and there wasn’t even a chance the fire department would need to show up. The recipe calls for 1/4 cup of oil, I used less and found that even with a non stick baking sheet they did stick a bit.

I had these as a side to fish en papillote with tomatoes and olives. They really saved that supper.