Categories
Frozen Desserts and Sweet Sauces The Book

190. Strawberry Cheesecake Ice Cream p.855


The recipe

This is ice cream for the lazy, if you have an ice cream maker you can get this cheesecake version will only take up about 20 minutes of your time. There’s also less decision making to do. For regular ice cream you make a custard and heat it until it just coats a spoon, about 170 degrees. This can be a bit of a trick if you’re rotten with a thermometer, or don’t know what nappé is supposed to look like. This ice cream does away with all that, it’s just chopped strawberries, cream cheese, sugar, milk, lemon juice, a pinch of salt, which go for a spin in the blender. You then stir in heavy cream, and chill the whole mixture. Once it’s cold you add it to the ice cream maker, churn it, then pop it in the freezer for a couple of hours to firm up.

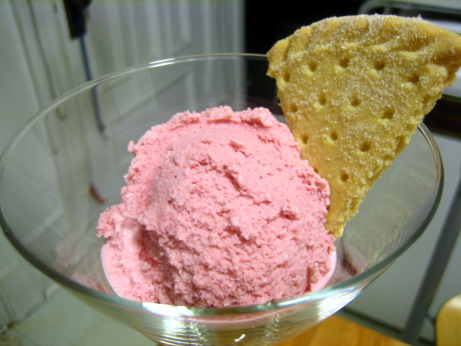
The Good: This ice cream tastes like strawberry cheesecake, only colder. The cream cheese added richness and tang to the ice cream, and accounted for a whole lot of the flavour. The strawberries were very present, but just like in strawberry cheesecake they didn’t taste much like strawberries anymore. I’m not sure why that is, but I find that through some alchemy they stop tasting like strawberries and start tasting like strawberry cheesecake somewhere along the way. That is in no way a bad thing, strawberries are great, but so is strawberry cheesecake.

The Bad: This ice cream tastes like strawberry cheesecake, only colder. My dining companion isn’t into strawberry cheesecake, or strawberry desserts in general, I had a lot of this stuff to go through alone. The texture was also a bit off. It was very thick, probably from the cream cheese, and set up quite firmly. I would have preferred a creamier, more yielding ice cream.

I skipped the chilling step after the ingredients are blended together, and went straight to the freezing step. The point of chilling the base is to help it freeze as quickly as possible when it goes into the ice cream maker. Faster freezing means smaller ice crystals, means a smoother creamier texture. It’s possible that my issues with the texture were a result of my shortcut, but I don’t think so. The mouth feel was good, it wasn’t gritty or grainy as ice creams that weren’t frozen quickly enough can get, so I suspect the texture is due to an excess of cream cheese.

The Verdict: It’s ice cream, it tasted good. On an objective – is this something you would eat again?, level the answer is absolutely yes. But, there are only so many ice cream making opportunities in life, and I think my time could be better spent.
Categories
Breakfast and Brunch The Book

177. Baked French Toast p.650


The recipe

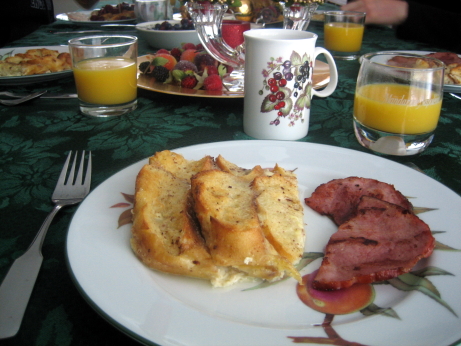
The blurb for this recipe suggests that it’s an easy and fuss-free way to make French Toast. I couldn’t disagree more. This looks like a scaled down restaurant recipe to me, and what works for breakfast for hundreds doesn’t necessarily make much sense when serving six. The idea with the recipe is to make a basic French toast batter (eggs, milk, salt) and pour it over buttered slices of bread in a buttered baking dish. You then let the mixture soak into the bread in the fridge for at least an hour. The bread then needs to warm up to room temperature, whereupon it’s sprinkled with sugar and baked in a 450 oven for 20 to 25 minutes. I can make normal people French toast for six and have everything cleaned up in 25 minutes, so what’s the point of this recipe? The Book suggests that you should assemble the dish and let the bread soak overnight, so that it can be popped in the oven while you’re setting the table and squeezing the orange juice (I wonder how many oranges are juiced rhetorically for every real life glass of fresh squeezed orange juice). I guess one advantage of this approach is that all the dishes can be done the night before, and you do have a bit less to do in the morning. But you also have to wake up extra early to take the baking dish out of the fridge and preheat the oven. Making normal French toast requires washing a cutting board, a mixing bowl, and a frying pan. I’m willing to wait until after breakfast to get to those. If I was serving this dish to twenty people this approach would make a lot of sense, but as it is it’s more trouble than it’s worth.

The greatest crime of this recipe is that it didn’t taste particularly good. There was nothing bad or objectionable about it, but it was very very dull. I always add vanilla, cinnamon, and nutmeg to my French toast, and I prefer to use a more interesting bread (sourdough is good) than the “soft supermarket Italian” loaf the recipe calls for. I understand that French toast is mostly a vehicle for maple syrup delivery, but that doesn’t mean that it needs to be boring. I should give The Book due credit for calling for whole milk in the recipe, I was sure they’d find a way to integrate heavy cream.

If I had a giant group coming for breakfast I’d consider tripling this recipe, and adding some flavour to it. Beyond spices and different bread I’d increase the called for 1/4 teaspoon of salt to 1/2 teaspoon. As it was it was OK, we ate it, and once it was drowned in maple syrup we enjoyed it, but I’d say this recipe is a definite missed opportunity.

Categories
Frozen Desserts and Sweet Sauces The Book

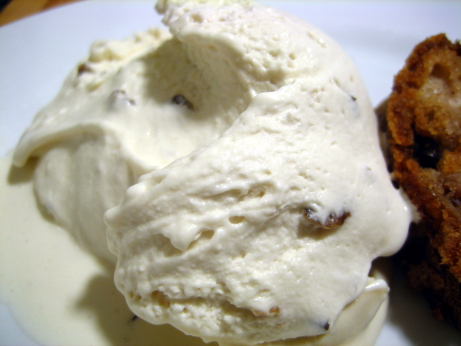
175. Maple Walnut Ice Cream p.858


The recipe

People asked me what I wanted for Christmas this year, and I told them that my heart’s fondest desire was an ice cream maker. Somehow this struck my extended family as hilarious. My dining companion, who had a lot to do with me getting a Kitchenaid mixer the previous Christmas, understood that I wasn’t joking, and got me the ice cream attachment for said mixer. She saved Christmas.

My mother occasionally made us ice cream as kids, but her machine is hand cranked. After the novelty wore off, the prospect of working that handle for twenty minutes every time we wanted a scoop of vanilla turned out to be more than a mother of three wanted to deal with. Her machine has been sitting safely in the cold room for the past fifteen years. By contrast the Kitchenaid attachment is completely painless. The only difficult thing is to remember to put the mixing bowl in the freezer the day before you want to use it. In my dream house with a second freezer the bowl will just live in there. I don’t want to shill for Kitchenaid, but I love my mixer. If our apartment was burning my first priorities would be to get my dining companion and the cat out, then I’d go back for the mixer.

I decided to start my ice cream experimentation with an old favorite, maple walnut. The recipe starts by reducing grade B maple syrup in a pot, then adding heavy cream, milk, and salt and bringing to a boil. Some of that hot syrup mixture is used to temper eggs, then the proto-custard goes back on the heat to thicken. As soon as it’s nappe the mixture is strained and chilled. The custard then goes into the ice cream maker, and when it’s partially frozen chopped toasted walnuts are added. The finished ice cream is still soft so it needs to spend a few hours in the freezer to harden.

This ice cream is incredibly rich, think Häagen-Dazs with some added fat. The ratio of dairy is 2 cups heavy cream to 1 cup whole milk, and that makes for some very creamy, very fatty, ice cream. Usually I’d fully support more fat in ice cream. I get saturated on ice cream very quickly, so that after about six bites I’m finished. I’m completely OK with making those six bites count by making them as decadent as possible. However, when I’ve got 1 1/2 quarts of it sitting in my freezer this insane richness becomes a problem. I fed most of it to guests, but I still had more than my fair share.

The maple and walnut flavours were really well balanced, I don’t like ice cream with too many chunks, and this recipe got the concentration just about right. The maple flavour permeated nicely, but as one epicurious poster suggested a final swirl of partially incorporated maple syrup would have been a nice touch. I’m lucky enough to live in Quebec, where some massive percentage of the world’s maple syrup supply is produced, so finding grade B syrup was as easy as walking to the local grocery store. Unfortunately those of you not living around here may have trouble getting your hands on it. It really is important to get this darker grade of syrup, as it has much more maple flavour. An imperfect substitution is to reduce the more commonly available grade A syrup to 2/3 of it’s original volume (since this recipe calls for reducing a cup of grade B to 3/4 of a cup, just reduce grade A by half). It should go without saying that fake maple syrup, or as we call it sirop de poo-poo, just won’t do.

As a first go with the ice cream maker I’d declare this a success. The flavour and texture were right, and while the richness became overwhelming quickly, those first few bites were lovely. If I didn’t have 40 different types of ice cream to get through, I’d make this one again.

Categories
Cookies, Bars, and Confections The Book

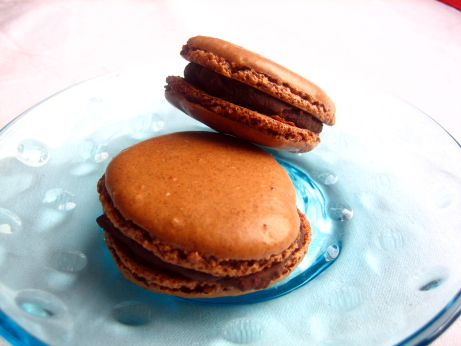
165. Chocolate Macaroons p.676

I can’t find the recipe for these online, but they’re so good I’ll retype it for you lovely people.

FOR MACAROONS

1 1/3 cups (7 ounces) skinned whole almonds

3 1/2 cups confectioners’ sugar

1/3 cup unsweetened Dutch-process cocoa powder

7/8 cup egg whites (from 6 large eggs)

pinch of salt

1 tablespoon granulated sugar

FOR GANACHE FILLING

1/2 cup heavy cream

2 teaspoons whole milk

2 1/2 tablespoons unsweetened Dutch-process cocoa powder

4 ounces good bittersweet chocolate, finely chopped

1 stick unsalted butter, cut into 1/2 inch pieces

SPECIAL EQUIPMENT: Parchment paper; a pastry bag fitted with a 1/4-inch plain tip

MAKE THE MACAROONS: Put a rack in middle of oven and preheat oven to 400F. Line two large baking sheets with parchment paper.

Pulse almonds with 2 cups confectioners’ sugar in a food processor until finely ground (almost to a powder). Add cocoa and remaining 1 1/2 cups confectioners’ sugar and pulse until combined.

Beat egg whites with salt in a large bowl with an electric mixer at medium-high speed until they hold soft peaks. Add granulated sugar and beat until whites just hold stiff peaks. Gently but thoroughly fold in almond mixture in 3 batches (batter will be very soft).

Transfer batter to a pastry bag and pipe 1-inch-wide mounds about 2 inches apart on lined baking sheets. Bake macaroons in batches until tops are slightly cracked and appear dry but are still slightly soft to the touch, 8 to 10 minutes per batch. Transfer macaroons, still on parchment, to dampened kitchen towels and cool for 5 minutes, then peel from paper and cool completely on racks.

MEANWHILE, MAKE THE GANACHE FILLING: Bring cream and milk to a boil in a small heavy saucepan over moderate heat. Whisk in cocoa and remove from heat. Add chopped chocolate and butter and stir until smooth. Cool filling, then refrigerate, covered, until firm enough to hold its shape when spread, about 30 minutes.

Sandwich flat sides of macaroons together with 1/2 teaspoon filling per pair.

COOK’S NOTES

  • While 7/8 cup egg whites may seem and odd measure, this amount gives the ideal texture and flavour. Measure the whites in a liquid-measuring cup.
  • The macaroons can be made up to 1 day before you fill them. Refrigerate, layered between sheets of wax or parchment paper, in an airtight container.
  • The filled macaroons keep, layered between sheets of way or parchment paper in an airtight container and refrigerated, for up to 1 week.

I don’t have enough good things to say about this recipe. The cookies were delicious and elegant. The recipe makes a lot of cookies, so I brought them to several gatherings, always to rave reviews. The chocolate filling is wonderful, and everyone loves ganache, but the cookie itself was my favourite part. I really like flourless cookies like this, the almonds provide substance, but the structure is all from the meringue. The outer surface of the cookie was smooth and crisp, the interior was like almond sponge candy, soft, but with just a little bit of toothsomeness. Despite all the sugar, they miraculously avoided being too sweet.

My only bone to pick with this recipe, is the use of the word macaroon in the title. A double O macaroon is an American coconut cookie, a single O macaron is a French almond cookie, get it straight Gourmet. These were truly excellent cookies, they were a bit time consuming and finicky, but I enjoyed the process. The recipe was well written and didn’t lead to any major surprises. My only caveat is to make sure to grind the almonds very finely, otherwise they’ll clog up the tip of the pastry bag when you’re piping the cookies.

A while ago my brother brought me some Macarons from a very posh bakery in Paris, and while theirs were certainly prettier, I preferred the flavour of my homemade version. These macarons are my new favourite cookie, and I expect them to be on frequent rotation in our house.

Categories
Pasta, Noodles, and Dumplings The Book

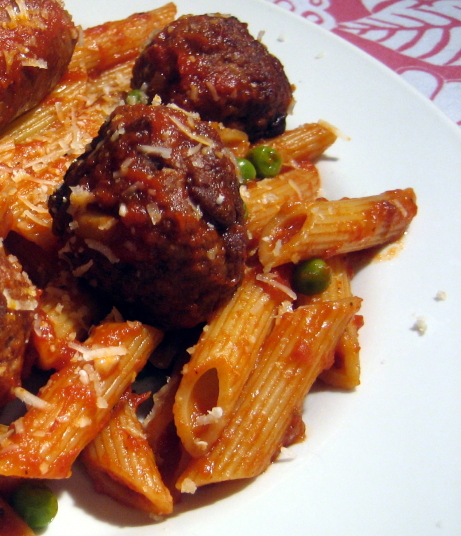
157. Sicilian Meatballs p.222


I can’t find a recipe for these meatballs online, but I can’t stand to think that the internet will go without it for another day.

3/4 cup fine fresh bread crumbs from Italian bread (crusts discarded)
1/4 cup whole milk
1/2 cup (2 3/4 oz) whole almonds with skin, toasted
1 1/2 teaspoons sugar
1 pound ground beef chuck
1/2 cup finely grated pecorino Romano or Parmigiano Reggiano
1/4 cup dried currants
1/4 cup pine nuts, lightly toasted
2 teaspoons salt
1/4 teaspoon ground cinnamon
1 large egg

Stir together bread crumbs and milk in a medium bowl.
Pulse almonds with sugar in a food processor until finely ground. Add to bread crumb mixture, along with remaining ingredients, and mix with your hands until just combined.
Roll mixture into 1-inch meatballs and transfer to a plate. Refrigerate if not cooking immediately.

These meatballs are a component of the Perciatelli with Sausage Ragù and Meatballs recipe I’ll be writing up next. In that preparation they’re browned in a pan, and then slowly simmered with a tomato sauce. I’m sure they would be excellent baked on their own, or as a component of any other recipe calling for meatballs. They are without a doubt the best meatballs I’ve ever had.

Everything about the recipe is spot on. The flavour was just perfect, there was something ethereal about the combination of the sweet cinnamon and currents with the beef and Parmigiano-Reggiano. The ground almonds grounded the flavour with an earthy body. They had a lovely fine grained texture, interspersed with chunks of pine nut and currant. They were delicate, but managed to hold together.

I’m going to Toronto with the boys this weekend, and I’m going head to head with one of them in a Sicilian meatball battle. He’ll be using the recipe from The Bon Appétit Cookbook, and I’ll go with this one. Whose cuisine will reign supreme? I like my chances, his recipe doesn’t call for almonds or cinnamon, which really made the dish for me.

I’ve you’ve ever loved a meatball, you owe it to yourself to try these. I barely noticed the rest of my dinner with these on the plate.

Categories
The Book Vegetables

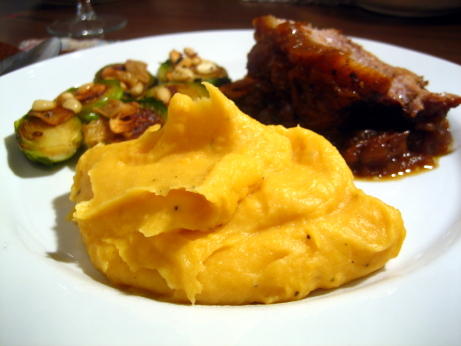
146. Sweet Potato Parsnip Purée p.584


The recipe

This dish seemed like a winner, but ended up a real disappointment. I’m a fan of sweet potatoes, and I adore parsnips, so what could possibly go wrong? It’s about a simple as a recipe can get, you just simmer chunks of sweet potato and parsnip ’till they’re tender, and run them through the food processor with butter, milk, brown sugar, salt, and pepper.

Looking at the recipe I thought the brown sugar would bring out the essence of the sweet potato and highlight some of its deeper flavours. I didn’t worry about extra sugar because the sharp turnipy bite of the parsnip would be there to pull the dish back from the saccharine edge. I couldn’t have been more wrong. The already sweet enough thank-you-very-much potatoes ended up cloying. The parsnips added a hint of a counterpoint, but not nearly enough, they did lend prominent overtones of bark and wood chips though. The recipe called for light brown sugar, which didn’t have enough molasses to do much for the flavour.

Probably the worst part of the recipe was the texture. The time in the food processor reduced this to a gummy coating paste. Every bite left me with the feeling of peanut butter glued to the roof of my mouth. I made the mistake of leaving some of the dishes for the morning, and the gunk in the food processor set up into a form of organic concrete. Add the weird, almost yellow, kinda orange, but definitely neon colour palate of this dish, and I was ready to be done with it.

I had half my portion on the night we made it, and tried to get through a bit more over the next couple days. Eventually I gave up and let it moulder in the fridge ’till I could throw it out in good conscience. Oddly, the Epicurious reviews for this recipe are fairly positive, so maybe I’m missing something. Mashed sweet potatoes are wonderful things, but from now on I’ll roast my parsnips and serve them along side.

Categories
Fish and Shellfish The Book

143. Fried Oysters Rémoulade p.329


The instructions for the oyster’s don’t appear online, but the rémoualde is the same one used in this recipe.

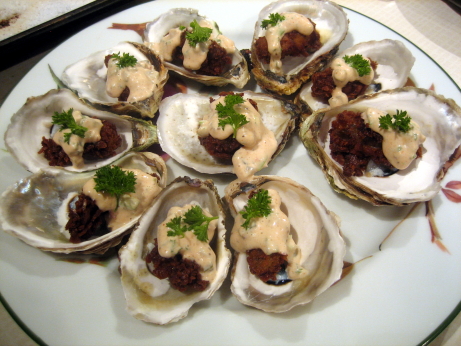
I tried a fried oyster for the first time about six months ago at a very posh restaurant. It was brought out as an unexpected treat between courses, and served with a fiery salsa. It had a crackling exterior that gave way with a burst of the the ocean, and revealed a delicately chewy, and still mostly raw oyster. We ate some wonderful food that night, but I think the impromptu oyster was my favourite part. I was hoping to match that experience with this recipe. In then end I didn’t quite succeed, but it’s a strong base for further experimentation.

For this recipe shucked oysters are dredged in a mixture of milk and egg, then coated with crushed saltine crackers. The oysters are deep fried for a couple of minutes, and served on their shells and topped with a rémoulade. The rémoulade is a simple mixture of mayonnaise, mustard, tomato paste, minced shallot, dill pickles, and scallion, with a dash of Worchestershire sauce, old bay seasoning, minced parsley, sugar, red wine vinegar, and a pinch of cayenne.

The rémoulade is absolutely excellent, and I’ll hear no word against it. It draws in a broad spectrum of ingredients, and covers its bases. It’s creamy, acidic, herbaceous, arromatic, and just a little bit spicy. It would be an ideal counterpoint to many simply flavoured seafood dishes. The use of Old Bay seasoning was intriguing. The Book doesn’t often call for prepared spices, particularly not a proprietary blend like Old Bay. I’d never tried the stuff before, and never seen it in stores here. Alton Brown is apparently in love with it, and I’d been interested to find out what the fuss was about. I was lucky to be cooking at my parent’s place, as it turned out my mother had a container in her pantry. Speculating on how old it was, would have been looking a gift horse in the mouth. I wasn’t blown away by Old Bay, but it certainly wasn’t bad. I was expecting it to be like those flavoured salts Food Network stars like to sell, but it seems to be more of an herb and spice blend. It was a worthwhile experience, but I’m not sure I’ll add it as a pantry staple.

The oysters in this recipe had some problems. I heated the oil to 375, and began the frying process. The recipe says they should cook for one-and-a-half to two minutes, but after about 45 seconds they were getting quite dark. By the time I got the oysters out they were much closer to mahogany than golden. The previous oyster recipe called for large oysters, so it was my fault when they overcooked, this one just calls for oysters in general. We have no way of knowing what size of oysters they tested this recipe on, but they must have been larger than mine. When there’s such wild variation in the sizes and cooking times of oysters, it’s pretty bad form not to give some indication of how that will affect the recipe. My oysters came out overcooked on the outside, which wasn’t a big deal, but they were cooked all the way through and mostly dried out on the inside. The fine texture of the oyster was lost, and replaced by chewiness. They still had good flavour, and the coating was nicely crisp. I’d certainly try oysters like this again, but I’d be sure to get them out of the oil significantly earlier.

These would work well at a cocktail party, or as a first course. The book suggests that they could be a main course as well, but I think they were a bit too rich to make a meal of. This recipe had its problems, but overall they were very enjoyable. With a little tweaking of the oysters and cooking time I think they could have been fantastic.

Categories
Pasta, Noodles, and Dumplings The Book

138. Macaroni and Cheese p.223


The recipe

I haven’t eaten all that much macaroni and cheese since I graduated to shoes with laces, but most of the kids I knew, and the stoners they grew up to be, loved the stuff from the box. As a child, macaroni and cheese was just the brand neutral way of saying your mom was making Kraft Dinner. I decided that KD was not for me around age 5, and looked for creative ways to avoid it, or mask its flavour. For reference, cut up hot dogs made it better, ketchup made it worse. Unfortunately kids in Montreal ate a lot of KD in the ’80s. My mom accepted my quirks and stopped serving it to me, but I still ate a lot of it at friends houses.

I was well pleased to leave mac and cheese behind me by the time I reached high school, and it stayed that way ’till a a nice Southern girl introduced me to the home made version in my early 20’s. Her macaroni and cheese was an entirely different animal, using real cheese, building flavour and texture with a roux, adding a touch of heat, and baking the whole thing with some extra cheese on top. I came around, and macaroni and cheese became something worth looking forward to.

I started experimenting with my own versions of mac and cheese, without much success. The problem I was trying to solve was that M&C is inherently rich, bland, and straightforward. Some people interpret that as a food surrogate for mother’s love, but I find it a bit dull. I tried adding herbs to the M&C, which fubared it, adding more chili flakes didn’t help either. One version with chipotles was actually pretty good, and worth revisiting sometime. Drawing on my childhood hot dog experience, I tried adding some slices of merguez, which worked quite well. These experiments brought me closer to what I was looking for, but they were still lacking. I was happy to discover that Gourmet has hit upon secret elixir that cuts the richness, and ties everything together, Dijon mustard. The Book’s version isn’t perfect, but I’m immensely grateful to it for bringing me closer to the ultimate macaroni and cheese recipe.

In this version, you make a three minute roux with butter, flour, and red pepper flakes, then whisk in milk and bring the sauce to a boil. After letting it boil for a few minutes, cream, extra-sharp Cheddar, and Dijon are added. The sauce is then added to cooked macaroni, and some of the water from the pot in a baking dish, then topped with mixture of butter, panko bread crumbs, and more cheese. The casserole goes into the oven for around half an hour, and then served.

The mustard and red pepper flakes make all the difference, and prevent this from being just too rich to be enjoyable. Getting the cheese right is important too. The recipe calls for extra-sharp Cheddar, which seems simple, but even an average grocery store will have about ten different versions, ranging from the plastic packaged stuff sold along with the milk, to fancy-pants imported stuff at the cheese counter. You can spend a fortune on truly wonderful Cheddar, but it’s probably a waste of money to go melting that into mac and cheese. The low end rubbery stuff will be OK, but not as good as it could be. The cheese really carries this dish so spending a bit more on a nice piece of aged local Cheddar is a worthwhile investment.

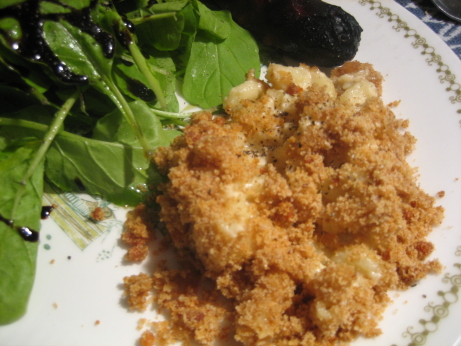
The recipe calls for panko, or other dried bread crumbs. I couldn’t get my hands on any panko, so I went with bread crumbs from the bakery down the street. Panko are known for their lightness and texture, while my bread crumbs were quite finely ground and dense. The 2 cups of panko the recipe called for might have been a nice topping, but 2 cups of my bread crumbs probably weighed twice as much as panko did. The macaroni was just too heavy on the topping, and the very dry bread crumbs sucked up a huge amount of moisture, so that within about 20 minutes of taking the dish out of the oven, the macaroni had set up, and lost the saucy-runny aspect you’re looking for in macaroni and cheese. You can see from the photo that it was next to impossible to find any of the macaroni under all the topping.

I think this recipe did a very nice job with the macaroni and sauce aspects, but fell short with the topping. I can’t comment on how it would have been with panko, but while they gave regular bread crumbs as an acceptable alternative, it obviously wasn’t. Beyond the topping, it was probably the best macaroni and cheese I’ve ever had. I’m sure that just a little tweaking could result in a truly great macaroni and cheese dinner, for the adults as well as the kids.