Categories
Beef, Veal, Pork, and Lamb The Book

200. Roast Pork Shoulder Cubano: Puerco Asado p.477


The recipe

Very few things in life are as good, or as simple as roast pork. The bachelor party tradition among my group of friends is to spit-roast a pig over charcoal. We recently went in on a roaster and put it through it’s paces before my wedding. Spending the afternoon hanging out and watching the pig spin is as near a perfect Saturday as I can imagine. The beauty of roasting pork is that you really don’t have to do much of anything to it, you just have to be very patient and let it get there in it’s own time. Even if you only rub it with salt, it will be fantastic. A few well chosen herbs and spices can make it even better, but you don’t want to overwhelm the awesome goodness that is roast pork. This recipe comes pretty close to replicating what I love about a whole rotisserie pig. If you don’t happen to have a giant roasting pit, or twenty friends to help you eat a whole pig, an oven roasted pork shoulder is a good way to go.

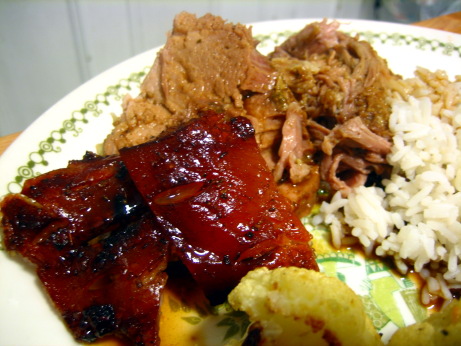
In this recipe starts with an 8 lb skin on picnic shoulder. The higher end grocery stores in my neighbourhood never carry these (one of them doesn’t carry any part of a pig or cow forward of the tenderloin), but they’re a staple at the more budget minded stores. At a dollar a pound, I can’t afford not to cook with pork shoulder. You start by stabbing 1 inch incisions in the skin with a very very sharp knife. This is by far the hardest part of the recipe, but it’s a nice way to get some aggression out. You then fill these incisions with a mixture of lime juice, garlic, salt, oregano, and cumin. More of the mixture gets rubbed onto the meat not covered with skin. The pork goes into the oven, with lime juice drizzled around it. The recipe asks for a roasting pan, but I used a dutch oven, which worked out just fine. After 30 minutes water and vinegar are added to the pan, and it’s left to roast covered for two hours, basting halfway through, and making sure not to get the precious cracklings wet. You then separate the skin from the meat, and roast uncovered for another hour and a half, basting under the skin every 20 minutes. When the skin is crackly and crisp you remove the roast and let it stand for 20 minutes, then carve. It’s served with the defatted pan juices, and cracklings.

The Good: This tastes absolutely fantastic. The meat is rich and succulent, mildly flavoured by the spices, but not so much as to distract you from the porcine bullet to the taste centers of your brain. The cracklings were out of this world. They turned a perfect mahogany, and with an extra sprinkle of salt became the perfect indulgence. Other than getting through the pig skin, the recipe was dead simple, used very easy to find ingredients, and even the poorest students can afford to make it.

The Bad: Preparing this can be a little dangerous. If you don’t have wickedly sharp knives, they’re likely to turn on you when trying to get through the skin. I nearly cut myself. A double edged knife, dagger, shiv, or any other type of stabbing weapon would probably be a lot safer. This recipe also takes quite a long time (count on five hours from start to finish), and sitting around the oven drinking beer has less appeal than the hypnotic rotation of a pig on the spit. That said, there’s very little intervention needed on your part. Making this again I would try to slice it. It kind of fell apart and came away in chunks. It’s basically pulled pork, so why not pull it? Next time I’ll pull the meat, and toss it with a little of the pan juices.

The Verdict: Eight dollars resulted in a fantastic dinner, and out of this world sandwiches for two for most of a week. Beat that. There are amazing things that can be done with pork shoulder, but a lot of them require special equipment, or more intervention on your part than this dish. If you do have a charcoal grill, this dish would probably be even better with long slow offset cooking, regular basting, and some smoke. But turning on the oven sure is a lot simpler, and nearly as delicious.
Categories
The Book Vegetables

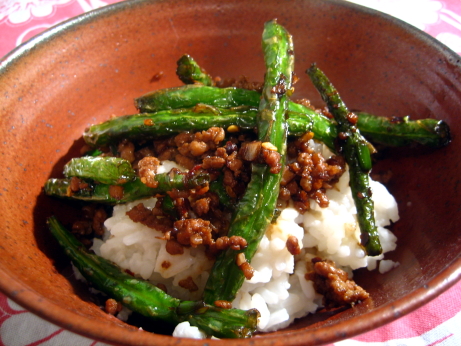
156. Dry-Cooked String Beans p.523


I couldn’t find a recipe for this one online.

I was in a frying mood the night I made these beans and the onion rings. The combination of a fried appetizer, and a fried main course was just a little too much. This stir fry was more than greasy enough all by itself.

In this dish trimmed green beans are deep fried in a wok for 30 seconds, then drained. You then drain off most of the oil, and build a stir fry starting with garlic, red pepper flakes, and ginger, then add ground pork. Once the pork is browned the beans go back in to reheat. A mixture of sugar, salt, soy sauce, sake, and sesame oil is then poured over top along with a handful of scallion greens and stirred to coat. Put this on a bed of sticky rice and you’ve got dinner.

The stir fry itself was totally delicious, it was an excellent balance of ingredients, just spicy enough, and wonderfully complex and arromatic. However, the stir fried beans were a bit weird and greasy. I trimmed the ends of the beans, so there was an open tube down the middle of them. Some of those tubes filled with oil during frying, and made the dish much greasier than I would have liked. It’s possible that my oil temperature dropped too far, and the pressure of escaping steam wasn’t enough to keep the oil out. If so, more oil, or smaller batches of beans would have taken care of the problem. The recipe says that the point of the deep frying is to lock in the coulour of the beans, but blanching, and shocking them would have done the same thing. The exterior of the beans took on a funny wrinkled texture, but they remained firm and crisp, and nicely green.

I’d happily make an adapted version of this recipe, but I think the deep fried green beans are better left behind. There are lots of recipes for dry-cooked beans out there, so I’ll presume it’s a well respected technique, and suggesting that they kind of suck is probably insulting someone’s Grandmother’s cooking, but they just weren’t my bag. The rest of the dish was excellent, and simply replacing the frying for a blanching would probably solve my only criticism of the recipe. If it had been less oily, it would have earned 4.5 mushrooms, but as it is, I can’t give it more than three.

Categories
Beef, Veal, Pork, and Lamb The Book

145. Cider Braised Pork Shoulder with Caramelized Onions p.476


The recipe

I love to braise. It’s almost worth suffering through the interminable and bitter winter of Montreal to do it. Of course you could braise all year round if you really wanted to, but somehow simmering meat for hours in the middle of July just doesn’t sound like a good idea. Braised meats are delicious, so I’ve tried letting someone in the kitchen at a restaurant suffer through the heat, and ordered it. Unfortunately it’s just too heavy to be enjoyable, and the process of doing it myself is one of my favourite parts. You really need a miserably blustery day to truly appreciate the joys of a good braise. I love the side benefits of the whole house smelling wonderful for a day, and the comforting knowledge that dinner is getting itself ready, and the more you ignore it the better it will be. With our oil heating, leaving the stove on is also a pretty economical way to heat the house.

You can’t beat a braise for thrift either. You can keep your precious tenderloins, give me the gnarliest, toughest, and cheapest cut of meat you can find, and it will turn to gold after a few hours with Le Creuset. It’s amazing to see this awful slab of meat transformed. The fat renders, and gets skimmed away, the connective tissue dissolves and become that elixir of mouth-feel, gelatin, and even the toughest cuts yeild to a fork. Those braising bits have so much more flavour than the quick searing cuts of meat, it just takes a little time to coax it out.

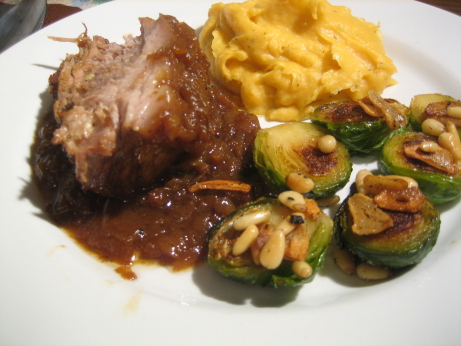
This recipe starts with a skin-on picnic ham. You score the skin, and insert cloves of garlic into the meat, add salt and pepper, and then brown it thoroughly in a heavy pot (cast iron is your friend). Once the meat is browned, you remove it, and sauté a whole whack of onions in the pot. When the onions turn golden, you add unfiltered apple cider, and the meat back to the pot. Then you seal it up, stick it in a 325 oven, and walk away for the next three hours or so. When you’re ready to serve, you remove the meat, and reduce the braising liquid to two cups. If the lid of your pot doesn’t have an extremely tight seal this will have happened naturally.

You can serve the pork right away, but it’ll taste better if you let it cool in the braising liquid, refrigerate it overnight, and then serve it for dinner the following day. This also makes defatting the sauce easy. The recipe doesn’t call for it, but I think it’s a necessary step. There’s a huge amount of fat on a pork shoulder, and most of it melts into the sauce. Even if you don’t have time to cool it it’s worth letting the liquid sit, and skimming part of the fat away. That’s one of the recipe’s biggest weaknesses. I defatted my sauce, but I don’t think I would have enjoyed it nearly as much if I’d followed the recipe exactly.

Recipes are never very specific about how much you should brown meat for a braise. Older books spout that nonsense about sealing in flavour, but really you’re building flavour. The darker the meat gets, without burning, the more flavourful your braise will turn out. There’s nothing at all wrong with your browned meat looking more than a little black, just avoid billowing clouds of smoke.

Braised pork shoulders are always good, it’s nearly impossible to mess a recipe like this up. This particular braise was minimalist, with just a few ingredients. I think it could have easily accommodated another flavour, a sprig of thyme would have done wonders. It was also a little unbalanced, both the onions and the cider were very sweet, and a little vinegar would have been welcome. The texture was excellent, succulent and falling apart, with a thick hearty sauce to go along with he meat. It made quite a nice dinner, but it was an outrageously good sandwich the following day.

The recipe’s biggest weakness was the skipping of the defatting step, other than that I have only minor quibbles. If you’re OK with sweeter meat dishes, leave it as is, if not go with some cider vinegar. I’d add herbs depending on my mood, it’s very nice even without them. If you don’t braise a lot, this recipe is certainly worth trying. And, if not this recipe, then some recipe, get out there and eat low on the hog.

Categories
Beef, Veal, Pork, and Lamb The Book

129. Posole: Pork and Hominy Stew p.486


Epicurious doesn’t have a recipe for this one, but one of the posole recipes I found on there looks great, and might address some of my concerns with this dish.

I was really excited to make this. My dining companion came home raving about the posole at Le Jolifou, a great Montreal restaurant which specializes in Mexican inspired Québécois dishes. A couple of weeks later we looked through The Book, and tried its take on posole. I can safely say that this recipe didn’t live up to Le Jolifou’s exacting standards.

Posole is a Mexican stew, which usually features pork and chiles and always features hominy (confusingly also called posole). This was my first experience with hominy, which are corn kernels that have had the outer hull removed by soaking in an alkaline solution. This is a really cool example of ancient food chemistry. At some point someone decided to boil their corn with a handful of ashes from the fireplace, and found that the corn tasted better and the family was healthier. The treatment makes the corn kernels more digestible, more nutrients become available, and it’s nutritionally complete enough to be a staple food. Without this process people surviving on corn will become malnourished and develop pellagra. Europeans brought maize back from the new world, but didn’t treat it, and pellagra became widespread. I’ve idly wondered what the difference between polenta and grits was for a while, and now I know. Polenta is made from untreated corn meal, while grits are made with treated corn meal, simple, but it wasn’t obvious. If you’re looking to geek out on more food science check out the Wikipedia page on this process, called nixtamalization.

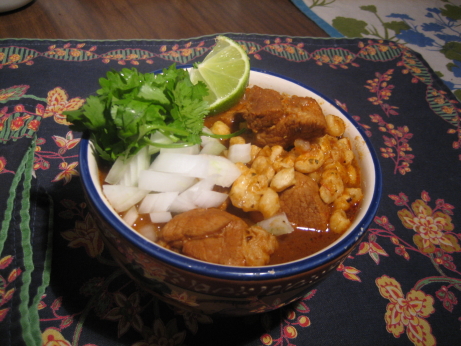
Despite my affection for hominy, this posole wasn’t great. It’s simple to make, just soak pasilla and guajillo chiles in water, then run them through the blender with oregano, salt, cumin seeds, pepper, garlic, tomato, and onion. You then simmer cubed pork shoulder in this sauce for an hour, add canned hominy, and continue to simmer for half an hour more. The stew is served with any combination of radishes, onion, cilantro, lettuce, chiles, lime wedges, and tortillas or tortilla chips.

The sauce has some very nice flavours to it, and I love pork braised with chiles, but the texture wasn’t great. I’m not really sure what happened, but my pork cubes ended up tough and dry, swimming in a thin sauce, with a huge amount of hominy. I would have preferred a thicker chunkier sauce, perhaps leaving the tomato and onion out of the blender, or mashing some of the hominy would have helped to thicken it up. I also would have preferred to shred the pork into the sauce. I found the chunks too big, and not amazingly flavorful. The recipe calls for three 15 oz cans of hominy, which should really be reduced to two. The other recipe I linked calls for 26 cloves of garlic, the version in The Book calls for only one. I’m not sure if I’d up the garlic quite so drastically, but I’d seek out a happy middle. The hominy itself was really interesting, it has a very unique chewy texture, which I liked. I’m not sure I’d really want to eat a whole lot of it at one sitting, it reminded me a bit of the tapioca balls in bubble tea.

As with most stews the posole improved with age. By day three the pork had soaked in more flavour, and softened, and the whole dish was more cohesive. It was perfectly edible, and even enjoyable, but my dining companion’s stellar dinner out had really built up my expectations for this posole, it just couldn’t live up to them.

Categories
Beef, Veal, Pork, and Lamb The Book

127. Barbecued Chile-Marinated Spareribs p.490

There’s no recipe for this one.

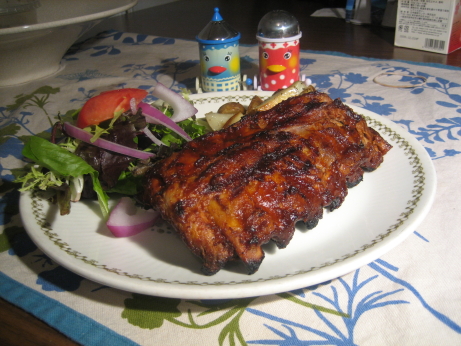
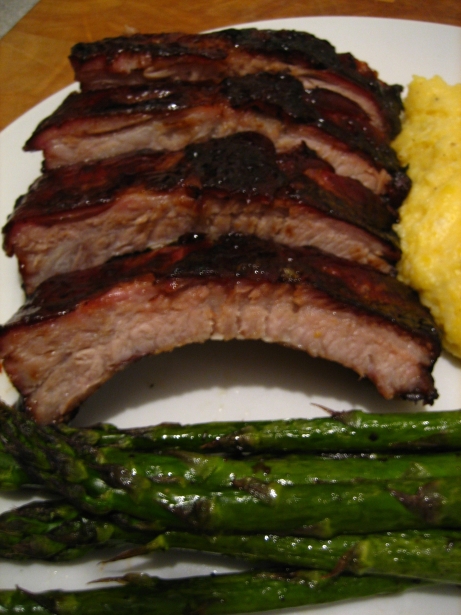
These ribs are dead simple, but they take some forethought. The ribs are simmered in water for an hour, then marinated in sauce of New Mexico chiles, ketchup, garlic, cider vinegar, brown sugar, salt, tequila, vegetable oil, ground cumin, and ground allspice for the next eight hours. Half of the sauce is used for the marinade, a quarter to baste during cooking, and the remaining quarter as a dipping sauce at the table. A little more than an hour before dinner the ribs come out of the fridge and warm to room temperature, then they’re transfered to a grill over low flame for 35 minutes. They’re basted with more of the sauce for the last 15 minutes of grilling time, then they’re rested for a few minutes, and served with the remaining sauce.

The barbecue sauce was simple and delicious. It filled its three roles admirably, it was salty enough to penetrate deeply as a marinate, sweet enough to turn to glowing caramel on the grill, and the uncooked dipping sauce’s raw edge complimented and contrasted the cooked sauce on the ribs. I was very happy to find a barbecue sauce that has a good deal of complexity, and shows some restraint with the sugar. I often find that restaurant ribs are sticky pork candy without much going on beyond slightly spiced ketchup. The bit of the tequila in the dipping sauce was a nice touch, of course bourbon wouldn’t be out of place either.

I’d make the sauce again without hesitation, and slather it on pretty much anything destined for the grill. Unfortunately I don’t think the hour-long simmer did the ribs any favours. They were wonderfully falling apart tender, but I think they gave up a lot of their flavour to the water that went down the drain. I wonder if steaming the ribs, then reducing the steaming liquid and adding it to the sauce would have brought more of the porky goodness to the plate? I preferred the texture and flavour of the meat from the Chinese-Hawaiian “Barbecued” Ribs where they were slowly roasted in the oven. I can’t really see why that technique wouldn’t work with this sauce, and it’s probably worth a test.

Both of those recipes use the word barbecue without actually grilling anything low and slow. I don’t really understand why The Book avoids a long grill over offset heat? Even with my gas grill with few soaked hardwood chips for smoke, I’d bet that basting the ribs with this sauce for a few hours would result in some pretty good barbecue.

I was actually happy with the way these came out, but they could have been even better. The cooking technique literally threw the baby out with the bathwater. They still tasted very nice, but it was primarily the delicious sauce that came through. The pork was there, but not nearly as prominent as it deserved to be.

Categories
Beef, Veal, Pork, and Lamb The Book

103. Grilled Pork Tenderloin with Mojo Sauce p.476


The recipe

I chose this recipe because it was over 30 degrees, humid, and didn’t look like it was going to cool down overnight. We had dinner late because we couldn’t stand the thought of eating until the relative cool of the evening. This tenderloin fit the bill for a light dish that wouldn’t heat up the house. I was too hot to think, and this recipe is simple enough that I didn’t have to. I happened to have a tenderloin in the freezer, and an orange in the fruit basket, so I didn’t have risk sweating my way over the grocery store.

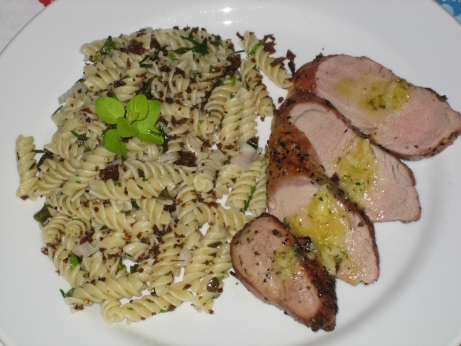
The recipe is simplicity itself. I just rubbed a tenderloin with salt, pepper, and a bit of oregano, then threw it on the grill. Meanwhile I whipped up the mojo sauce, which is nothing by orange juice, garlic, oil, and more oregano. Once the meat was cooked and rested, I sliced it and drizzled with the sauce.

For about five minutes work it was quite good. Oregano smells wonderful when it burns, and it left the crust of the meat with that great charred perfume. I’m a bit iffy on meats with sweet sauces, but the citrus was welcome on that stiflingly humid evening. The orange and garlic combination was new to me, and it probably wouldn’t occur to me to pair them, but it was quite delicious. The simply grilled tenderloin was nicely complimented by the straightforward flavours of the sauce. I wasn’t really in a mood for nuance, and this was certainly unfussy.

This isn’t a dish to try to impress the neighbours with, but it has its uses. It uses simple ingredients, doesn’t heat up the house, and it’s pretty much impossible to mess up. When you’re suffering from heat stroke these are all good qualities. Pork tenderloin is very lean and easy on the stomach, but it still feels substantial and like a real meal. When I’m looking forward to a night of uncomfortable twisting and turning in the sauna that is my bedroom, indigestion is not a risk I’m willing to take. This dish didn’t wow me, but I was very happy to find it on that particular night.

Categories
Beef, Veal, Pork, and Lamb The Book

99. Chinese-Hawaiian “Barbecued” Ribs p.491

The recipe

I wasn’t sure I was going to like these ribs, but I was pleasantly surprised. These are racks of ribs marinated in soy, sugar, ketchup, sherry, salt, garlic and ginger. They’re then baked at 325 for 1 3/4 hours, basting with the marinade every 20 minutes. Everything about the title is confusing, I get the Chinese part of the name, soy + ginger + garlic = Chinese, fine. But Hawaiian? Is it the ketchup that makes it Hawaiian? The blurb says the recipe came from a Hawaiian restaurant, but if they’d come from a Sweedish restaurant would they be Chinese-Sweedish ribs? Chinese-Hawaiian doesn’t really tell me a lot about what they’re going to taste like. “Barbecued” is another misnomer, quotation marks don’t turn barbecue into baking. Yes they’re low and slow, but where there’s no smoke there’s no barbecue.

I’m usually pretty relaxed about health and safety standards when I’m cooking. I’m happy to eat raw eggs, tartars and carpaccios, and if some leftovers have sat out longer than they should have I’m probably still going to eat them for lunch the next day. One aspect of this recipe gave me pause though. The ribs are marinated, then the marinade is used to baste the ribs while they’re in the oven. Using a marinade as a basting liquid or a glaze is often a delicious way of making the most of your marinade. Usually the marinade is brought to a boil before it does double duty as a glaze though. Not here, the only safety precaution the recipe mentions is to apply the last coating of glaze 10 minutes before you take it out of the oven. Maybe 10 minutes at 325 is enough to kill any nasties that have been growing in the raw meat juice marinade sitting out for nearly two hours… maybe. I followed the directions, and nothing bad happened. But it seems like bringing the marinade to a boil for a few minutes would make the whole operation a lot safer and not take a lot more effort.

The ribs themselves were surprisingly good. I was only able to marinade them for about 1 1/2 hours, instead of 3, but that didn’t seem to hurt anything. All the sugar in the marinade made for a thick caramelized coating, and the long cooking time almost gave them the falling off the bone tender texture of real barbecue. The glaze was thick enough to seal all the juices inside the ribs, so they stayed nice and moist. The glaze was a bit intense for my taste, it was really really salty and sweet. It could have used something to cut that. Normally some acid would be added to give the glaze some tang, or some chilies would spice things up. I find those flavours can balance the salty-sweet, whereas the ginger and garlic here weren’t really able to get the job done. I thought they were tasty, but too intense and unbalanced. My first few bites were delicious but after a couple of ribs it was getting to be too much.

I liked the baked and glazed ribs concept a lot. In future I would play around with the glaze, and try to keep the flavours in equilibrium. Low sodium soy might be an improvement, and cutting the sugar wouldn’t be a bad idea. The baking “barbecue” worked out well, it’s a pretty good substitute for those of use who don’t have a pit in the back yard. I’m still unclear how they were Hawaiian, but they were good.

Categories
Pasta, Noodles, and Dumplings The Book

70. Chow Fun with Chinese Barbecued Pork and Snow Peas p.249


The recipe.

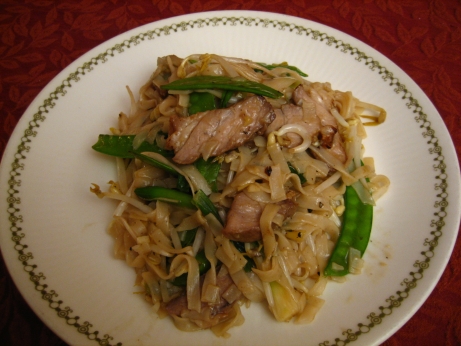
This is the stir fry I mentioned a while back. It called for leftover Char Siu as an ingredient. The stir fry alone is competent, but not exceptional. The char siu is what makes the dish. The stir fry is very restrained in it’s selection of vegetables, just snow peats, scallions, and bean sprouts. This is cooked up with rice noodles, and the char siu. The flavourings are a fairly standard combination of chicken stock, oyster sauce, soy, sake, sugar, garlic, ginger, and sesame oil. All good stuff, nothing hard to find, and quite well balanced. This stir fry is the closest to Chinese take-out I’ve ever made at home. I’ve made stir fries I’ve liked better, but this was the most authentic if you’ll permit me to stretch that word to it’s breaking point.

The cooking directions seem a bit backwards to me. The recipe fries the noodles in the wok first, then adds the vegetables and aromatics and sauces. One of my favourite things about stir fry is the way the vegetables get seared on the outside, but remain crisp inside. In this method the noodles prevent the veg from ever really making contact with the bottom of the wok, so they end up steamed. That’s not so bad, but I missed the caramelization.

Once the frying is done the stock, oyster sauce, soy, sake, sugar mixture is added, boiled and thickened with corn starch. This did a great job of producing that take-out style slick glossy texture, and made them more fun to eat.

I was a bit surprised to see that the recipe called for a wok. Home wokery seems to have fallen out of favour in the last decade or so (Cook’s illustrated would have us throw them out). The objection is that wok cooking is an extremely high heat cooking method, and that our ranges (even top of the line gas burners) can’t pump out the BTUs necessary to do the technique justice. I’ve seen Alton Brown get around this by setting a round bottomed wok on the industrial sized burner of a turkey deep-fryer, or over a charcoal chimney starter. I have a large round-bottomed stain-prone steel wok that I enjoy cooking with on my electric burner, even if it doesn’t have the benediction of Chris Kimball. I like the size and shape more than its heat distribution properties. I enjoy having room to move the food around without slopping things over the sides. I’m a fan of my wok, but I’ve felt like it was my dirty little secret. It’s nice to see The Book validate my cooking lifestyle choice.

If you have Char Siu in the freezer this recipe takes 20 minutes, and tastes great. I’d like to have a control condition stir fry though. I feel like the Char Siu recipe was so good it could make any stir fry delicious. However, if you’re feeling like DIY take-out food this dish is the way to go.

Categories
Beef, Veal, Pork, and Lamb The Book

62. Char Siu p.478

The recipe

This recipe was a bit of effort, but boy was it worth it. The ingredients are simple and readily available, and they come together in the most delightful way with the judicious application of heat. The recipe calls for a 1 pound boneless pork butt or shoulder. I bought a whole picnic ham (from the shoulder, but with bones and skin left on), and had to figure out how to butcher it myself. I tried leaving the skin on to see if it would end up edible, it didn’t, but no big loss. Score one for the scientific method.

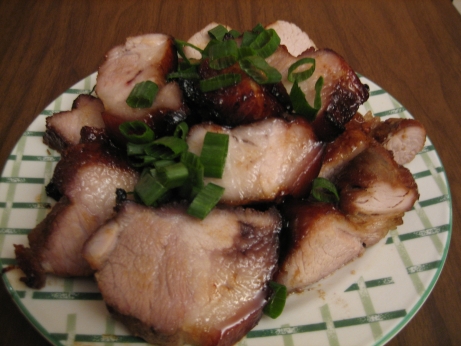
In this recipe strips of pork are marinated in hoisin, soy, sake, honey, ginger, and garlic. The pork is then roasted on a rack in the oven over a pan of water. The marinade is cooked down, and used to baste the pork strips regularly throughout the cooking. It’s really like painting on layers of flavour. The water keeps things moist, and the marinade caramelizes into sticky gold. As the layers of marinade build up the caramel colour deepens it starts to get really difficult to wait for it to be done.

Because so much effort is put into getting as much of the marinade as possible to stick to the pork it ends up being quite intensely flavored. Sweet, salty, and perfumed with garlic and ginger. It’s meant to be one of many small dishes in a Chinese meal, and it’s powerful enough that you can’t eat too much of it. I absolutely loved it, but after about four slices I was finished. The recipe mentions that once made and frozen this pork becomes a valuable commodity, excellent for adding just a bit to a stir fry, or rice. I absolutely have to agree. I ended up with a good bit of leftovers, and I used it to full advantage. It was excellent in a cold sandwich, stirred into scrambled eggs, and as an ingredient in a stir fry from The Book.

Better than the dish itself was the thinking behind it. It’s loaded with the innovation and creativity of limited resources. It takes an inexpensive and unloved part of the pig, and brings out it’s best with some tenderizing and flavorful marinade. Then it goes to great lengths to use that marinade to best advantage. Better yet, the final dish makes a little meat go a long way. In a more reasonable food economy where meat is a valuable and limited resource a little bit of this pork could bring a lot of flavour to other dishes. You can probably get as much meat enjoyment from a little bit of this, as you would from eating a big steak.

Moving this dish in and out of the oven to baste it every few minutes was sticky and somewhat irritating work. I had to jurry rig a rack over pan system, and I came close to sending the pork for a swim in the water bath more than once. I didn’t enjoy cleaning up the little dribbles of marinade that seemed to get cooked onto every available surface, but I absolutely enjoyed the dish. Since is freezes so well I’d suggest doubling the recipe and keeping more of this stuff on hand than you think you’ll need.

Categories
Beef, Veal, Pork, and Lamb The Book

53. Old Fashioned Meat Loaf p.448

The recipe

Take cover! NORAD has detected an extraterrestrial turd loaf coming in fast over the arctic. It wants our Humpback whales to save the future.

This was not the most visually appealing dish I’ve ever made, but it did taste good. I think it’s um, distinctive, shape helped with the flavour too. I’ve made meatloaf in a loaf pan before, and while it’s geometry is soothing, there isn’t all that much surface area exposed to direct heat. This loaf developed an excellent crunchy crust which really made the dish. The secret to the crispy crust was a healthy slathering of ketchup before it went into the oven.

I’m quite proud of The Book for using ketchup here. They didn’t seem to feel bad about it, or tell me that I really should be making my own, or ordering heirloom tomato preserves off the internet. They recommended plain-old funding-John-Kerry’s-political-career ketchup. Maybe this was The Book’s attempt to show that they’re in touch with the common man? who knowns? But I appreciate it.

This is a classic meat loaf recipe that doesn’t deviate or experiment too much. There are a couple of nice touches, but generally it’s straight up memories of childhood comfort food. It starts with a sweat of onions, garlic, celery, carrot, and scallions (one of the slight deviations from the textbook). Then ground beef, pork, breadcrumbs, eggs, and parsley are lightly mixed together and shaped into the giant worm of Arrakis. It’s then covered in ketchup, and baked through.

The book recommends having the butcher coarsely grind beef chuck, and pork tenderloins for this recipe, instead of using the finely textured twice-ground meat that’s available pre-packaged. It wasn’t a command from on high, so I just bought the stuff in the display case. I now see that The Book was right and I was wrong. The flavours in the meatloaf were excellent, its main problem was the texture. It was too tightly packed and dense. Using more coarsely ground meat would almost certainly have taken care of the textural issues, and made this an even better loaf.

My dining companion and I occasionally like to have cook-offs. Kind of like Iron Chef in the privacy of our own home. This dish was my entry for battle meatloaf, and I’m happy to say that it swept the judges votes. Her entry won top marks for presentation and style, but it just couldn’t compete on seasoning and depth of flavour. I’ll have to write the Heinz company to thank them.