Categories
Cakes The Book

202. Carrot Cake with Cream Cheese Frosting p.726


The recipe courtesy of The Ulterior Epicure

Sometimes the stars just don’t align, and the baking Gods abandon you for a day. I’ve learned a lot about cooking and baking through this project, and I’ve gotten to a point where I rarely make the boneheaded mistakes that plagued my early experiments, but there’s always room to regress. Today’s flub up was ignoring the instruction to “butter and flour cake pans, knocking out excess flour”. Every single baked good in the book calls for this step, and it’s become such a familiar phrase that I think I literally didn’t see it when reading the recipe. Sure something felt wrong while I poured the cake batter into the pans, but I was working on three other things at the time and didn’t give it much thought. The finished product suffered as a result, but I’m going to rate it anyway.

This is a pretty straightforward cake, but it does have quite a few ingredients. Beyond the basic cake stuff (flour, baking soda, baking powder, and salt, vegetable oil, eggs, sugar) the cake mixes in a healthy dose of grated carrot, cinnamon, crushed pineapple, sweetened flaked coconut, walnuts, and raisins. The raisins were optional, and I opted against. The cakes are split into two 9 inch round cake pans and banked for ~40 minutes. Once cooled they’re stacked and frosted with whipped cream cheese, butter, vanilla, and icing sugar.

The Good: The cake tasted great. It had excellent carrot flavour and the cream cheese frosting wasn’t too sweet or too heavy, and set the cake off nicely. I like walnuts in a carrot cake, and this one was no exception. The frosting had a great texture, going on easily, and holding its shape quite well, as you’ll read below the underlying cake had some serious structural issues, but if I had to try to ice something with the texture of a jello salad again, this would be a pretty good frosting option.

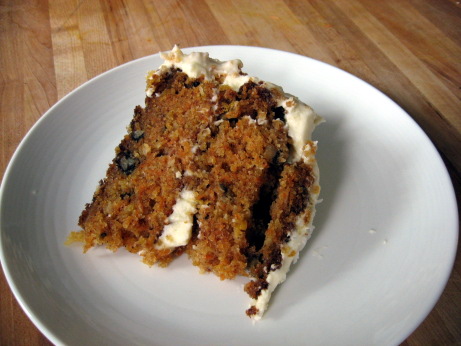
The Bad: My main issues with the cake were with the enormous almost goupy crumb of the cake, and its total lack of structural integrity. The recipe describes it as an unusually moist cake, but I think my mishaps turned a moist cake into a barely solid cake. Without the butter and flour in the pans, the cakes stuck. The first cake I tried to unmould fell to pieces, with the baked-on bits staying firmly in the pan, and most of the extremely moist and soft innards flying through the cooling rack I was trying to unmould onto. I tried to free up the bottoms, but the cake was just tearing while it was still warm. Instead of cooling the cakes on racks, I left them in their pans, and was able to get an offset spatula in to free them up once they’d cooled. This probably means that the cakes steamed as they cooled, instead of crisping up on the outside. I can’t know how the cooling in the pan affected the texture of the cake, or how the rough extraction from their pans affected the overall integrity of the cake. As it was, the cake was nearly impossible to cut, it was as malleable as an angel food cake, and the slices crumbled as I tried to serve them. Even chilled the next day getting a piece out as a whole was a challenge. The soft and goopy frosting added more to the structural integrity than the cake itself. The pineapple was added to this dish to make it extra moist, and it did its job. At least with my mixed up cooking instructions that extra moisture probably made a bad situation worse. More importantly, it didn’t taste all that good. I don’t think carrot and pineapple are a natural pairing, and I just found it out of place.

The Verdict: A lot of what went wrong with this cake was totally my fault, but things like the over-large crumb, and not so nice addition of pineapple were certainly problems with the recipe. Looking beyond the serious textural issues, the cake did taste very good. It wasn’t my absolute favorite carrot cake, but it did a good job of delivering carrot flavour in a cream cheese icing package. I suspect that baking this in a 13×9 pan instead of trying to make it a layered cake would make the textural issues much less important, and it would be just as delicious. The cake that I produced was not fit to serve to guests, and the cake I made is the cake I have to rate, but I think I’m going to give this recipe another chance in the next couple of months, and I might decide to revise the rating upwards then.
Categories
Beef, Veal, Pork, and Lamb The Book

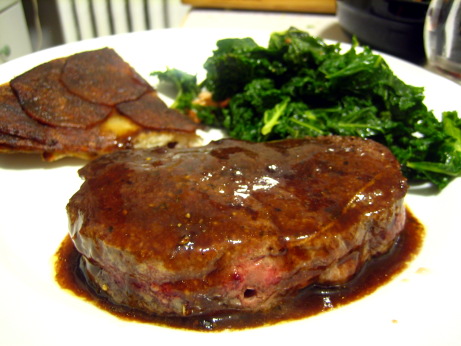
195. Pan-Seared Filet Mignon with Merlot Sauce p.428

Here’s the recipe for the Merlot sauce part of this dish,

This is the second time I’ve made this dish. The first was almost two years ago, when I made it for my dining companion’s birthday dinner. Part of her birthday present was that the steak would be just for her, not for The Project too. That meant I could just cook and serve without the awkward photo session in the kitchen that dishes for The Project require, and I didn’t have to be taking mental notes for a future blog post (but of course I couldn’t help myself). That first time this steak was absolutely fantastic, and I was looking forward to making it again to count it towards The Project.

In this dish filet-mignon is browned in a skillet, then finished in the oven, and served topped with a red wine sauce. The Merlot sauce starts by making a caramel, then dissolving vinegar in the boiling sugar. In another pan onions are softened in butter, and wine, veal stock or demi glace, are added and simmered. The mixture is seasoned, and the solids are strained out. The liquid is added to the caramel, and heated until it’s dissolved. The steaks are served drizzled with the sauce.

The Good: It’s filet mignon with a buttery wine and veal demi-glace sauce, it’s fantastic, if you have any love in your heart for red meat, you will like this dish. The caramel is the surprising part of the sauce, adding sweetness, but also a depth which compliments the browned meat. Filet mignon is all about the so-tender-it-shouldn’t-be-possible texture, and a rich sauce really enhances that. Since it’s a lean cut of meat, the buttery sauce doesn’t put it over the top. Demi-glace is a wonderful wonderful thing, everything it touches just gets better, enhancing flavours, smoothing textures, and bringing the whole sauce together.

The Bad: While the dish was delicious, the technique could have been improved. The steaks are seared in the pan, then roasted to finish cooking through. This builds up a good deal of delicious, wonderful, splendid, magical fond on the bottom of the pan. These browned bits are usually deglazed and used as part of a pan sauce, but this recipe commits the nearly unforgivable sin of just throwing all that goodness out. It also doesn’t ask for any juices that run from the steaks as they rest to be poured into the sauce. That’s just silly. By skipping these steps the sauce can be completely made in advance, which is convenient, but you end up throwing away what could have been the most flavorful part of the dish.

I made a mistake with these steaks and trusted my meat thermometer over my eyes and finger test. I was paranoid about over cooking the steaks (filet mignon overcooks quickly), so I took them out sooner than I should and counted on carryover to finish the job. I radically miscalculated and ended up serving them quite rare. I take my steak rare, and it was a little underdone for me, my dining companion prefers the medium side of medium rare, and it was just not going to happen for her. We were already sitting, and she didn’t want to wait to put it back in the oven, so she nuked it instead. A little part of me dies every time that happens, but it’s a good incentive to get the steaks right the first time.

The Verdict: These were delicious steaks, no question, I’d recommend them to anyone. I think there are a few tweaks that should be made, and it’s certainly not an inexpensive way to do dinner, but if you’re looking for an impressive but not overwhelming dish for a special occasion this is a pretty darn good way to go. The final taste is certainly 5 mushroom worthy, but the travesty of the wasted fond means that I can’t give it full marks.

Categories
The Book Vegetables

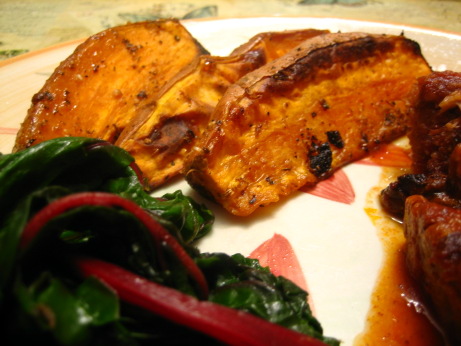
187. Roasted Spiced Sweet Potatoes p.584

The recipe

I served these sweet potatoes along with Lillie’s North Carolina Chopped Barbecue , and they were a lovely accompaniment. I should have though about the colour palate of our dinner before pairing sweet potatoes and barbecue, the plate was a little orange. You may eat with your eyes first, but the important bit is what happens when you put it in your mouth. On that score these potatoes did very well.

The Good: These sweet potatoes are delicious, simple, and in most other contexts very good looking. A child could make them, you just cut sweet potatoes into wedges, toss with ground coriander, fennel, oregano, red pepper flakes, kosher salt, and oil, and roast for 40ish minutes. It’s an unusual combination of spices, but they worked unexpectedly well together.

The Bad: Wedges are a popular food shape because they’re easy to cut, but they cook very unevenly. The thin edges of the sweet potatoes started to dry out before the interiors fully cooked. This was less of a problem with smaller sweet potatoes, but with any bigger onces I’d try a more uniform shape. I’d consider using a baking sheet you don’t like much for this dish because there was a lot of burned on spices and oil that were difficult to get off.

The Verdict: This recipe was a winner, it was simple, delicious, and took less than ten minutes of my time. Roasted sweet potatoes are always a treat, I love how the exterior puffs up and blisters while the interior melts into a decadent mash. The spice mixture was very present, but didn’t overwhelm the natural goodness of the sweet potatoes. These would be good any time of the year, but I think they’d be exceptional as part of a not-so-traditional Thanksgiving. My Dad loves to scandalize the family by messing with classic Thanksgiving dishes, and this recipe would really fit the bill.

Categories
Fish and Shellfish The Book

180. Seared Salmon with Balsamic Glaze p.290


The recipe

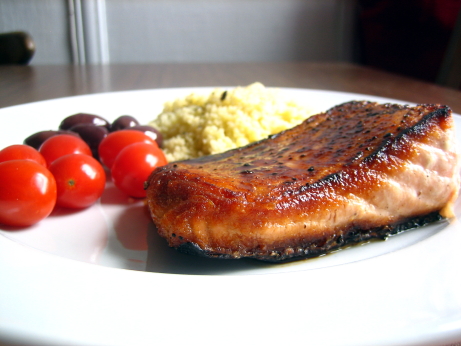
Jacques Pépin said it best, if you’re going to fry fish, try to do it at the neighbours’ house. I was working from home the day I made this dish, and my dining companion wasn’t getting back until 9 pm so I decided to make fish for lunch. As regular readers know she’s not entirely comfortable with things that come from the sea, fish least of all. Salmon is her most hated fish, so I try to be polite about cooking it when she’s not around. The dish is as simple as it gets, requiring just a few pantry staples, and some nice Salmon fillets (I quartered the recipe and just made a fillet for me). All the recipe involves is seasoning the fillets with salt and pepper, pan frying them until they’re just cooked through, and once the salmon is out of the pan deglazing it with a mixture of balsamic vinegar, water, lemon juice, and light brown sugar. Once this sauce is reduced it’s spooned over the salmon and served.

What the book fails to mention is the billowing clouds of fish smoke that will fill your poorly ventilated apartment, and that the first thing your dining companion will say when she gets home is “gah, fish!”, or that your pillows will smell like fried fish, and that a week later the kitchen pantry will still have a faint fishy odor. The fish is seared over highest heat in a non-stick skillet (more cancer, yay!), and it started smoking right away. After the recommended 4 minutes the skin side of the salmon was black and charred, not seared. I reduced the heat a bit to cook the top side of the fillet, and got it out of the pan once it was nicely browned. When I cut into it the fish was still pretty much raw in the thicker part of the fillet. I only served myself the skinnier side which had cooked through. I made the pan sauce, and brushed a bit of it onto my fish, but it picked up a lot of the burned flavour from the pan, and I over reduced it as well (that pan was really hot).

I suspect that my modifications to the recipe got me into trouble. I was supposed to cook 4 fillets in a 12 inch skillet, but I did one fillet in an 8 inch skillet. With less fish per square inch to cool the skillet down the fish may have burned faster. I think my fillet was a more like 8 ounces than the recommended 6, which would explain the under cooking.

Despite the snafus, the fish tasted quite good. I peeled off the blackened skin, and the meat of the thinner half of the fillet was nicely cooked. Even with the slightly burned flavour the pan sauce worked well, it was a touch sweet for my taste, and if I made it again I’d increase the lemon juice, but it did compliment the salmon’s flavour nicely.

I guess this is one of those recipes that you can’t vary from too much. Many Epicurious posters appear to have had success, so I’m going to assume that this is just me. Make sure to cook the right number and size of fillets and you’ll probably be OK. Even done properly your house is going to stink though. I usually try to do this kind of smelly frying on the side burner of the grill, to better let the neighbours enjoy the fishy smell. Alas, I was out of gas the day I decided to make this. I was happy with the flavours of this dish, and it was dead simple, and lightning fast, but I was less happy with the fine film of fish oil that settled onto every horizontal surface in the whole house. I’ll plan on trying this one again and following the instructions more closely next time. For now I’ll give it at

Categories
Cakes The Book

176. Apple Raisin Cake p.704


The recipe

I’m really trying to work on my hosting skills these days. I love to have friends over, and I love to cook for them. Unfortunately that often means that we don’t spend a lot of time together once they arrive. I’m pretty rotten about sharing kitchen space, or involving others in the cooking process. Being territorial about ones kitchen seems like a natural, if not admirable trait. I wish I was the sort of person who could invite a bunch of friends over, give everyone a kitchen job, and just let them do it. Unfortunately, I’m a kitchen control freak, if I do invite someone to cook with me I can’t help but looking over their shoulders and making little “suggestions” which make me feel like a patronizing ass. I’m not a particularly controlling or dominant person in other aspects of my life, but I don’t think I’ll ever play well with others in the kitchen. So, if I want to see my guests, and I can’t share the cooking with them, I’ve got to get better about doing prep work well ahead.

When I made this cake The Boys were over for the day. It’s quite rare that we all get together in one place at one time, so I should have made the most of it. They’ve been very supportive of The Project, and I like to share, or occasionally inflict, recipes from The Book with / on them. I decided to make this cake, and yesterday’s ice cream while they were over. The recipes list the combined active time at 1 hour 10 minutes, but I probably spent two hours at it between prepping and cleaning. Two hours isolated in the kitchen is a fair chunk of the time The Boys were over. Both the cake and the ice cream were good, and I really enjoyed sharing them with my friends, but I should have thought it through and prepared those dishes the night before. I am getting better about kitchen time management, but it’s definitely a work in progress.

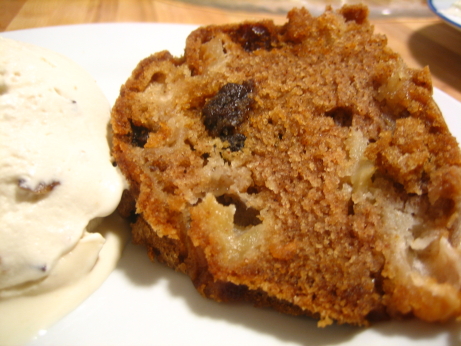
The cake is easy to make, you sift together flour, baking soda, and salt in one bowl, then wisk together vegetable oil, eggs, white and brown sugars, cinnamon, nutmeg, dark rum, and vanilla in another. You fold the dry stuff into the wet stuff and gently incorporate diced apples, and raisins. The batter goes into a Bundt pan and bakes.

This was a very soft, moist cake. It was gently spiced, and packed with apples and raisins. When I served it to the boys the afternoon it was baked I wasn’t too impressed. There was nothing wrong with it, but it wasn’t as good as I was hoping. The recipe suggests that it improves with age though, and I’d have to agree. It was much much better by the third day. There was no great change, all the flavours were the same, but it really came together and the texture firmed up a bit. If I baked it again I would choose a firmer apple. The recipe calls for Cortland or Empire, and the blurb ahead suggests that Golden Delicious or Gala will do, but my cortlands melted into the cake, and those other options are evens softer. I would use Granny Smiths both for the bitterness, and the very firm texture. The cake was a little on the sweet side anyway, so a more assertive apple wouldn’t hurt anything.

This cake worked best as an opportunistic snack. Since it keeps at room temperature for five days (read a week), it was nice to have it there ready to go. The first night I served it I was thinking of it as a big Bundt spice cake for after dinner. It didn’t really fit that application, it’s much more of an afternoon coffee cake (the rest of the coffee cakes are in the Breakfast and Brunch section, and I don’t understand why it wasn’t grouped with them). I’m not going to rush to make it again, but if it was sitting on the counter I’d certainly cut myself a slice.

Categories
Beef, Veal, Pork, and Lamb The Book

164. Beef Bourguignon p.440

The recipe

I grew up on boeuf bourguignon, we could be guaranteed to have it at least once a month during the winter. Since a braised dish like this is better a day or two after it’s cooked, my mom would usually make it on a Sunday, and it would sit on the chilly garage floor in her big orange Le Creuset Dutch oven until dinnertime on Tuesday. I remember being very small, and being tasked with bringing the stew upstairs, I swear that cast iron pot weighed more than I did, and it was so cold it burned. Since a bottle of wine goes into a boeuf bourguignon, and even after a long braise not all of the alcohol cooks off, I’m wondering if this dish didn’t contribute to some of excellent sleeping we got done as kids.

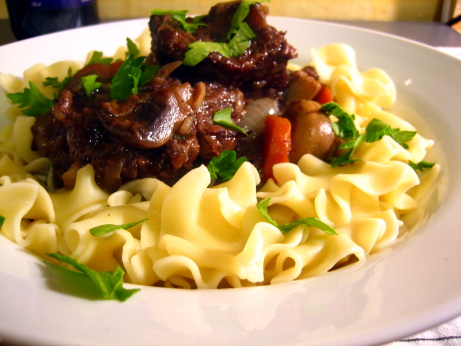
The recipe starts with some home butchery, getting beef shoulder off the bone, and cubed. The cubes are then seasoned, coated in flour, and thoroughly browned. The meat then braises for an afternoon with sweated onions, garlic, and carrots, tomatoes, red wine, and a bouquet garni. While that’s going on you get to blanch and peel boiling onions. I hate peeling boiling onions, but I did it anyway. The onions then get browned with some butter, and simmered until tender. You then sauté some mushrooms in butter, and add the mushrooms and onions to the braise, and let it simmer for a few minutes. Once everything’s done cooking you can eat it right away, or better yet stick in in the back of the fridge and forget about it for a couple of days. The Book recommends serving this dish with buttered potatoes, but I’ve always been a fan of egg noodles with boeuf bourguignon, so that’s what we had.

There’s an error in this recipe. The first ingredient listed is a quarter pound of bacon, and the fist cooking direction is to simmer the bacon in water for a few minutes. That bacon is never mentioned again. The linked Epicurious recipe has the error fixed, you’re supposed to crisp up the bacon in the pot before starting the braise, but it’s mystery bacon if you follow The Books version. I guessed that it was meant to go into the braise, and that worked out well, but I hope they’ve caught this mistake in the updated version of The Book.

I was entirely satisfied with this dish, it tastes just like what mom used to make, it’s hearty, rich, stick to your ribs, winter cooking. The flavours were right on, this is not a difficult dish to get close to right, but making it really well is a challenge. This is a really solid boeuf bourguignon recipe, my only complaint is that it was a bit too salty. I’ll certainly be making this one again next winter.

Categories
Breads and Crackers The Book

150. Pumpkin Apple Bread p.599


The recipe courtesy of The Amateur Gourmet

A loaf is a dangerous thing. It hardly ever occurs to me to bake up some banana bread, or a lemon loaf. If you asked me to name my favourite desserts, no loaf would make the list. I don’t think about them, or go out of my way to get them, but the second a sweet cakey loaf comes out of the oven, I’m lost.

The insatiable craving that takes hold isn’t a conscious one. I have a slice with an espresso, dining companion and I chat about how nice it is, then I get on with my day. About half an hour later, I find myself back in the kitchen with the knife in my hand, and another reasonably sized slice on my plate. After all, it really is better when it’s fresh. I trick myself into the next slice with a lie about pumpkin and apples making it a healthy snack. It gets worse from there, I probably won’t have any appetite for dinner, and my dining companion may not get a second slice. These types of loaves are a triumph of marketing. They’re not cake, they’re bread! and look! they’re full of healthy fruits and nuts! At least a black-forest cake is honest, if you eat it for breakfast you know exactly what a bad person you are.

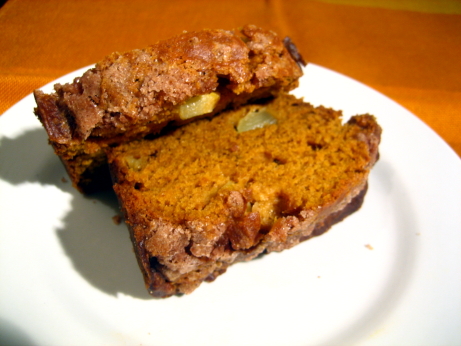
This particular temptress is made by sifting together flour, salt, baking soda, cinnamon, nutmeg, cloves, and allspice in one bowl, canned pumpkin, oil, sugar, and eggs in another, and then adding the dry stuff to the wet stuff, and folding in chopped apples. The batter is divided between two loaf pans, sprinkled with the inevitable streusel topping (flour, sugar, cinnamon and butter), and baked.

This bread is about as autumnal as it gets. Think pumpkin pie, now with carbs! If you’re a fan of the pie, this is the bread for you. Being in the house while it baked was a pleasure. Someone should distill it into a perfume. The bread was exceptionally moist, with a loose spongy crumb, and the barest hint of toothsomeness. The chunks of Granny Smith added a necessary textural counterpoint, and a little bit of bite to keep things in perspective. This topping worked better than some of The Book’s other efforts. In this case it was a flavourful glaze on the loaf, and not the overwhelming mess that sometimes results. I might toss in some crushed walnuts or pecans next time, but as it is it’s a winner

If you’re the sort of person who has a modicum of self control when it comes to baked goods in the house, I happily recommend this bread. For those of you who don’t, bake it and give it away, at least you’ll be able to enjoy the way your kitchen smells. Unfortunately I tried the second strategy, and for possibly the first time in human history a lab full of grad students was too busy to polish off free baking on the first go-round. I ended up with a third of a loaf on my desk for the afternoon, I’m not at liberty to say what happened next.

Categories
Sauces and Salsas The Book

134. Mayonnaise p.886


Surprisingly there’s no recipe on Epicurious for plain old mayonnaise.

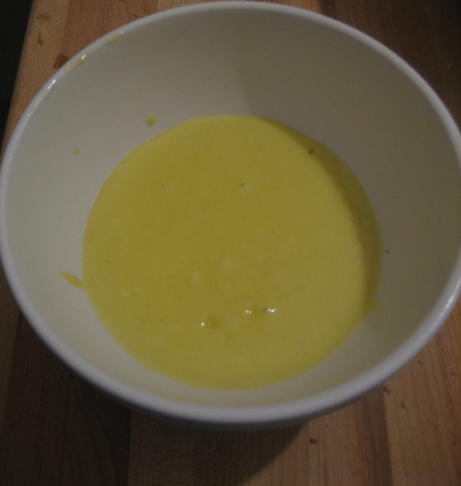
This is The Book’s basic mayonnaise recipe, there are 7 other dressed up mayonnaises which use this recipe as a starting point, so I’ll be making it a bunch of times. As with most of the basic recipes in the book, it’s solid, but not exciting. However, that’s not a bad thing. I made the mayo recipe from the ’76 edition of The Joy of Cooking, and it was a disaster. Joy is often considered the home cook’s go to source for no-fail basic recipes, and you’d think they’d have a rock solid mayo method, but no. Mayonnaise is made by whisking an egg yolk with oil a drop at a time to get an emulsion started, then pouring in a staggering amount of oil in a slow stream while whisking madly. Once the mayo is thickened and the emulsion is no longer at risk of breaking, you can add extra flavourings. The crazy Joy method would have you add mustard, salt, cayenne, lemon juice, and confectioners sugar before you start the emulsion at all. The mustard is a common addition because it helps the emulsion form, but adding the lemon juice is just stupidity. The acid fights the emulsion you’re working so hard to build, why would you put it in there? I whisked for about 20 minutes before I could get a thin soupy consistency. It was an OK salad dressing, but a horrific mayo. The Book’s method is much more logical, and worked very well.

In this recipe an egg yolk is whisked together with Dijon and salt, then 3/4 of a cup of oil are added first by drops then in a slow stream. Once the mixture starts to thicken to the point that it’s getting difficult to whisk, and the emulsion is solid, you add a bit of white wine vinegar, and lemon juice. Then the remainder of the oil is added in a stream, and salt and white pepper are stirred in.

The mayo wasn’t quite as thick as I would have liked. You’d be better applying this with a spoon than a knife. But, it was silky smooth, and nicely glossy. I might have cut 1/2 a teaspoon of liquid somewhere to keep the mayo thicker. The flavour was pretty good, it had the eggy richness I look for in a mayonnaise, with a little bite from the vinegar and lemon juice, and a background body from the mustard. It was very nice spread on a sandwich, and quite a bit better than the the stuff that comes from a jar.

My only real complaint was the instruction to use either olive oil or vegetable oil in the recipe without further specification. Depending on your olive oil it can have a very pronounced taste, which is great for some applications, but it can make for a very weirdly flavoured mayonnaise. I made mayo at my brother’s place a few weeks back, and the only oil he had was olive, that mayo was edible, but none of us liked it much. It lacked the  mellow feeling I’m looking for in mayo, all of those grassy spicy flavours I enjoy in good olive oil where just unpleasant and distracting when they were so amplified. If you’re going to use all olive oil, I’d recommend using very mildly flavoured oil, preferably not extra virgin. I think the best tactic is to use a small amount of good olive oil for flavour, and then use a flavourless oil for the rest of it (canola, or grapeseed would be my first choices, using about 1 part olive oil to 3 parts other oil).

Mayonnaise is quite easy to make, and homemade has a definite edge over the store bought kind. I’ve always been disturbed by the fact that Hellman’s is made with real eggs, but keeps for months. Without all of the shelf-stable preservatives this mayo will only keep for two days. Since it’s really not much trouble to make, and it tastes better than the miracles of food science on the grocery shelf, I’ve been getting into the habit of making my own. This recipe uses a solid method, and it’s a jumping off point for a lot of interesting variations. It won’t blow your mind, and I’ve had better homemade mayo, but it’s worth trying at least once.

Categories
Beef, Veal, Pork, and Lamb The Book

127. Barbecued Chile-Marinated Spareribs p.490

There’s no recipe for this one.

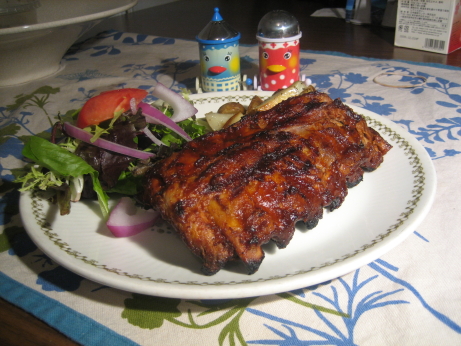
These ribs are dead simple, but they take some forethought. The ribs are simmered in water for an hour, then marinated in sauce of New Mexico chiles, ketchup, garlic, cider vinegar, brown sugar, salt, tequila, vegetable oil, ground cumin, and ground allspice for the next eight hours. Half of the sauce is used for the marinade, a quarter to baste during cooking, and the remaining quarter as a dipping sauce at the table. A little more than an hour before dinner the ribs come out of the fridge and warm to room temperature, then they’re transfered to a grill over low flame for 35 minutes. They’re basted with more of the sauce for the last 15 minutes of grilling time, then they’re rested for a few minutes, and served with the remaining sauce.

The barbecue sauce was simple and delicious. It filled its three roles admirably, it was salty enough to penetrate deeply as a marinate, sweet enough to turn to glowing caramel on the grill, and the uncooked dipping sauce’s raw edge complimented and contrasted the cooked sauce on the ribs. I was very happy to find a barbecue sauce that has a good deal of complexity, and shows some restraint with the sugar. I often find that restaurant ribs are sticky pork candy without much going on beyond slightly spiced ketchup. The bit of the tequila in the dipping sauce was a nice touch, of course bourbon wouldn’t be out of place either.

I’d make the sauce again without hesitation, and slather it on pretty much anything destined for the grill. Unfortunately I don’t think the hour-long simmer did the ribs any favours. They were wonderfully falling apart tender, but I think they gave up a lot of their flavour to the water that went down the drain. I wonder if steaming the ribs, then reducing the steaming liquid and adding it to the sauce would have brought more of the porky goodness to the plate? I preferred the texture and flavour of the meat from the Chinese-Hawaiian “Barbecued” Ribs where they were slowly roasted in the oven. I can’t really see why that technique wouldn’t work with this sauce, and it’s probably worth a test.

Both of those recipes use the word barbecue without actually grilling anything low and slow. I don’t really understand why The Book avoids a long grill over offset heat? Even with my gas grill with few soaked hardwood chips for smoke, I’d bet that basting the ribs with this sauce for a few hours would result in some pretty good barbecue.

I was actually happy with the way these came out, but they could have been even better. The cooking technique literally threw the baby out with the bathwater. They still tasted very nice, but it was primarily the delicious sauce that came through. The pork was there, but not nearly as prominent as it deserved to be.

Categories
Poultry The Book

125. Chicken with Cornmeal Dumplings p.373


The recipe

I had The Book for a while before I started The Project, and this was one of the recipes I used regularly before The Book and I got serious. Making it again emphasized how much The Project has changed my cooking style. The biggest difference is that I actually read the recipe this time around, and it came out much better.

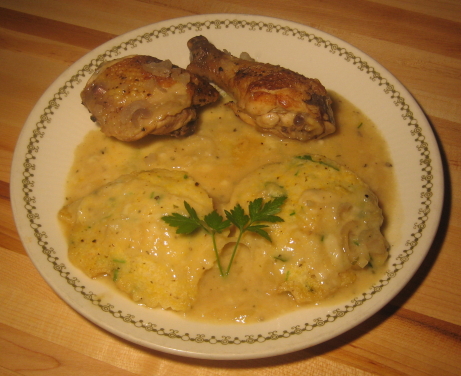
You start by breaking a chicken down into serving sized pieces, browning them, and then simmering them with white wine and shallots ’till the pieces are cooked through. Meanwhile you put together a dumpling dough with flour, cornmeal, baking powder, baking soda, salt, pepper, butter, chives, parsley, and buttermilk. The chicken is moved to the oven, and the juices left in the skillet are fortified with stock, cream, salt, and pepper. Once this gravy is simmering the dumplings are gently dropped in and allowed to cook for about 15 minutes, then it’s time to eat.

This time around the cooking went well, there wasn’t anything too tricky about it. In previous attempts I’ve managed to really mess things up. The biggest lesson I learned is that the cooking vessel the recipe calls for really is important. In the recipe all of this happens in a deep 12 inch heavy skillet, I don’t have one of those (but if Santa got my letter…), so I used to make it in a 5 quart pot. It seemed like a pretty decent substitution at the time, but I was wrong. Getting the dumplings right depends on the depth of liquid they’re simmered in, too deep and they disintegrate, or raft together into one super-dumpling. This time I used a 10 quart oval dutch oven, which has a similar surface area to a 12 inch skillet, and things worked out. The other lesson I’ve learned is the difference between a simmer and boil. Previously I had my gravy boiling away, and the bubbles tore my dumplings to shreds, a gentle simmer with just the occasional bubble reaching the surface is the way to go. I’m kind of amazed that I made this recipe about five times trying to get it right, and I didn’t pick up on what I was doing wrong.

My previous attempts also fell prey to my undiagnosed culinary dyslexia.I constantly mix up shallots and scallions, I have the hardest time keeping them straight. They’re very different, but it’s a coin toss as to which vegetable I’ll imaging when I hear one of those words. I’m embarrassed to say that I have the same problem with elevators and escalators, weird eh? Long simmered scallions turn kind of yellow and gross, I wouldn’t recommend the substitution. Some practice with The Book has made me sensitive to my neurological condition, so now I double check that my shopping list corresponds to the ingredient list.

My standards for what constitutes a successful recipe have also changed over the course of The Project. In the pre-Project days this came out reasonably well a couple of times, and I was quite impressed by it. I still love the dumplings, and I’d be happy to make them again and again, but the chicken is lacking, and the whole dish is bland. I’ve ranted about chicken skin and wet cooking methods several times, and it was just as unappealing here as in every other dish. The chicken is poached in white wine and shallots, which is fine, but the addition of another herb would be nice, maybe thyme, rosemary, or tarragon. The chicken gives up flavour and interest for the sake of the dumplings, and it’s almost a fair trade. The dumplings have an excellent texture and flavour, they pull in loads of chicken flavour, and have a wonderful buttermilk tang. They’re absolutely the highlight of the dish. I’d rather skip the whole chicken making part of this dish, and just make the dumplings in a stock based gravy. The chicken would be better served by being simply grilled, then served along with the dumplings. Doing something about the beige on beige colour pallet would be nice too.

Maybe I’m being a bit unfair. This dish is a Southern classic, but I have no clue what it’s supposed to taste like. I don’t have any reference point, so I’m probably trying to turn this dish into something it was never meant to be. Using a chicken like this allows a little bit of meat to be stretched into a hearty meal, so there are perfectly good reasons for recipes like this to have developed. And, Its blandly fatty simplicity is what comfort food is all about, but it’s not really my thing these days.

Pre-Project me liked this dish because the dumplings are awesome, but also because it’s essentially a one pot dish, it’s quite inexpensive, not too hard, and it makes good leftovers. Present day me doesn’t mind working a little harder, spending a little more, or using a few more dishes (much to my dining companion’s chagrin) for a better dish. I agree with my former self about the dumplings though.