Categories
Beef, Veal, Pork, and Lamb The Book

200. Roast Pork Shoulder Cubano: Puerco Asado p.477


The recipe

Very few things in life are as good, or as simple as roast pork. The bachelor party tradition among my group of friends is to spit-roast a pig over charcoal. We recently went in on a roaster and put it through it’s paces before my wedding. Spending the afternoon hanging out and watching the pig spin is as near a perfect Saturday as I can imagine. The beauty of roasting pork is that you really don’t have to do much of anything to it, you just have to be very patient and let it get there in it’s own time. Even if you only rub it with salt, it will be fantastic. A few well chosen herbs and spices can make it even better, but you don’t want to overwhelm the awesome goodness that is roast pork. This recipe comes pretty close to replicating what I love about a whole rotisserie pig. If you don’t happen to have a giant roasting pit, or twenty friends to help you eat a whole pig, an oven roasted pork shoulder is a good way to go.

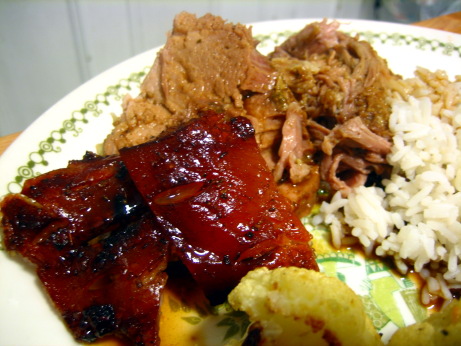
In this recipe starts with an 8 lb skin on picnic shoulder. The higher end grocery stores in my neighbourhood never carry these (one of them doesn’t carry any part of a pig or cow forward of the tenderloin), but they’re a staple at the more budget minded stores. At a dollar a pound, I can’t afford not to cook with pork shoulder. You start by stabbing 1 inch incisions in the skin with a very very sharp knife. This is by far the hardest part of the recipe, but it’s a nice way to get some aggression out. You then fill these incisions with a mixture of lime juice, garlic, salt, oregano, and cumin. More of the mixture gets rubbed onto the meat not covered with skin. The pork goes into the oven, with lime juice drizzled around it. The recipe asks for a roasting pan, but I used a dutch oven, which worked out just fine. After 30 minutes water and vinegar are added to the pan, and it’s left to roast covered for two hours, basting halfway through, and making sure not to get the precious cracklings wet. You then separate the skin from the meat, and roast uncovered for another hour and a half, basting under the skin every 20 minutes. When the skin is crackly and crisp you remove the roast and let it stand for 20 minutes, then carve. It’s served with the defatted pan juices, and cracklings.

The Good: This tastes absolutely fantastic. The meat is rich and succulent, mildly flavoured by the spices, but not so much as to distract you from the porcine bullet to the taste centers of your brain. The cracklings were out of this world. They turned a perfect mahogany, and with an extra sprinkle of salt became the perfect indulgence. Other than getting through the pig skin, the recipe was dead simple, used very easy to find ingredients, and even the poorest students can afford to make it.

The Bad: Preparing this can be a little dangerous. If you don’t have wickedly sharp knives, they’re likely to turn on you when trying to get through the skin. I nearly cut myself. A double edged knife, dagger, shiv, or any other type of stabbing weapon would probably be a lot safer. This recipe also takes quite a long time (count on five hours from start to finish), and sitting around the oven drinking beer has less appeal than the hypnotic rotation of a pig on the spit. That said, there’s very little intervention needed on your part. Making this again I would try to slice it. It kind of fell apart and came away in chunks. It’s basically pulled pork, so why not pull it? Next time I’ll pull the meat, and toss it with a little of the pan juices.

The Verdict: Eight dollars resulted in a fantastic dinner, and out of this world sandwiches for two for most of a week. Beat that. There are amazing things that can be done with pork shoulder, but a lot of them require special equipment, or more intervention on your part than this dish. If you do have a charcoal grill, this dish would probably be even better with long slow offset cooking, regular basting, and some smoke. But turning on the oven sure is a lot simpler, and nearly as delicious.
Categories
Fruit Desserts The Book

197. Balsamic-Roasted Pears with Pepper and Honey p.809


The recipe

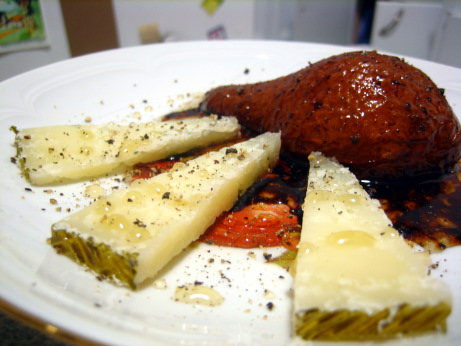
This is how dessert should be, simple, elegant, and not too heavy. I’m rarely in the mood for a slice of cake right after dinner, and the yen for creamy or frozen treats is even more infrequent. However, a cheese plate is always a welcome addition to a meal. I associate this kind of dessert with Italy, almost every menu has some combination of pear and cheese, and honey is a common touch. One handwritten menu I saw there advertised the Cheese and Fear plate, I was hoping for a high concept dessert, but it was just a typo. 

The dish is simple to prepare. You roast pears in a buttered dish for 20 minutes, then pour balsamic over-top and roast for 5 minutes more. Plate the pears, drizzle them with the juices in the pan, and serve with slices of Manchego. Drizzle the plate with honey, and a few grinds of pepper, then serve. 

The Good: With hardly any effort you can create a satisfying end to a big meal. It can pretty well all be done ahead, just pop the pears in the oven while you’re clearing the dishes, and they’ll be ready once everyone’s finished up their glass of wine. The presentation is really simple, but it looks great. Pears have a great affinity for cheeses, and the balsamic glaze makes the whole interaction more appealing. The few grinds of pepper emphasize the sweet-savoury interplay of the dish. 

The Bad: For my money, this dish could have moved a little more to the savoury side. I found the total effect of the roasted pears + balsamic + honey to be pushing the balance too far to the sweet. A more assertively flavoured cheese, or a more acidic balsamic might have brought things into balance. Also, some nuts would have been a very nice addition to the plate. Roasting pears is a delicate affair. I like them roasted so that they loose their gritty-grainy texture, but I don’t want them to turn to mush. Mine ended up a little too firm, half an hour in the oven might have served them better.

The Verdict: Overall I was quite happy with this dish, and I’ll certainly make variations on it again. I think disliking sweet desserts is largely my own personal issue, so it may not turn others off this dish at all. Even with a little more sugar than I would have liked it was an excellent way to finish our dinner.

Categories
Sauces and Salsas The Book

134. Mayonnaise p.886


Surprisingly there’s no recipe on Epicurious for plain old mayonnaise.

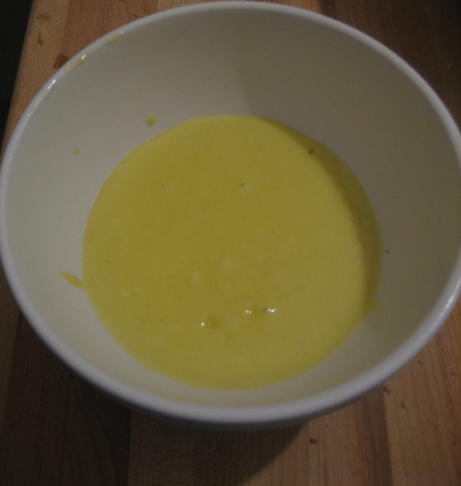
This is The Book’s basic mayonnaise recipe, there are 7 other dressed up mayonnaises which use this recipe as a starting point, so I’ll be making it a bunch of times. As with most of the basic recipes in the book, it’s solid, but not exciting. However, that’s not a bad thing. I made the mayo recipe from the ’76 edition of The Joy of Cooking, and it was a disaster. Joy is often considered the home cook’s go to source for no-fail basic recipes, and you’d think they’d have a rock solid mayo method, but no. Mayonnaise is made by whisking an egg yolk with oil a drop at a time to get an emulsion started, then pouring in a staggering amount of oil in a slow stream while whisking madly. Once the mayo is thickened and the emulsion is no longer at risk of breaking, you can add extra flavourings. The crazy Joy method would have you add mustard, salt, cayenne, lemon juice, and confectioners sugar before you start the emulsion at all. The mustard is a common addition because it helps the emulsion form, but adding the lemon juice is just stupidity. The acid fights the emulsion you’re working so hard to build, why would you put it in there? I whisked for about 20 minutes before I could get a thin soupy consistency. It was an OK salad dressing, but a horrific mayo. The Book’s method is much more logical, and worked very well.

In this recipe an egg yolk is whisked together with Dijon and salt, then 3/4 of a cup of oil are added first by drops then in a slow stream. Once the mixture starts to thicken to the point that it’s getting difficult to whisk, and the emulsion is solid, you add a bit of white wine vinegar, and lemon juice. Then the remainder of the oil is added in a stream, and salt and white pepper are stirred in.

The mayo wasn’t quite as thick as I would have liked. You’d be better applying this with a spoon than a knife. But, it was silky smooth, and nicely glossy. I might have cut 1/2 a teaspoon of liquid somewhere to keep the mayo thicker. The flavour was pretty good, it had the eggy richness I look for in a mayonnaise, with a little bite from the vinegar and lemon juice, and a background body from the mustard. It was very nice spread on a sandwich, and quite a bit better than the the stuff that comes from a jar.

My only real complaint was the instruction to use either olive oil or vegetable oil in the recipe without further specification. Depending on your olive oil it can have a very pronounced taste, which is great for some applications, but it can make for a very weirdly flavoured mayonnaise. I made mayo at my brother’s place a few weeks back, and the only oil he had was olive, that mayo was edible, but none of us liked it much. It lacked the  mellow feeling I’m looking for in mayo, all of those grassy spicy flavours I enjoy in good olive oil where just unpleasant and distracting when they were so amplified. If you’re going to use all olive oil, I’d recommend using very mildly flavoured oil, preferably not extra virgin. I think the best tactic is to use a small amount of good olive oil for flavour, and then use a flavourless oil for the rest of it (canola, or grapeseed would be my first choices, using about 1 part olive oil to 3 parts other oil).

Mayonnaise is quite easy to make, and homemade has a definite edge over the store bought kind. I’ve always been disturbed by the fact that Hellman’s is made with real eggs, but keeps for months. Without all of the shelf-stable preservatives this mayo will only keep for two days. Since it’s really not much trouble to make, and it tastes better than the miracles of food science on the grocery shelf, I’ve been getting into the habit of making my own. This recipe uses a solid method, and it’s a jumping off point for a lot of interesting variations. It won’t blow your mind, and I’ve had better homemade mayo, but it’s worth trying at least once.

Categories
Salads The Book

118. Frisée Salad with Lardons and Poached Eggs p.139


The recipe on Epicurious helpfully notes that frisée is curly French endive, The Book does not. I really don’t know much about salad greens and this one stumped me. I thought it was the curly lettuce I picked up, but I was wrong. My dining companion is a salad impresario, she has an eye for composition, and a knack for combining the elements, and pairing them with the perfect dressing. I usually stick to the lettuce or other greens with balsamic and olive oil formula. It’s not exciting, but it gets the job done.

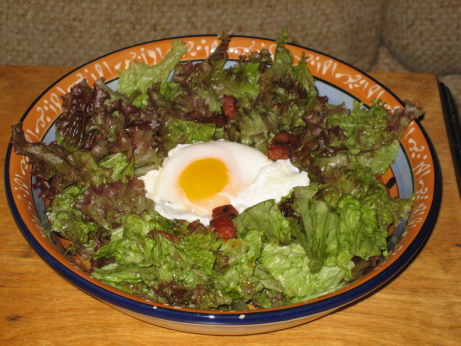
In this salad slab bacon is cut into lardons, which are cooked up in a pan then put to the side. Shallots are then softened in the bacon drippings, and red wine vinegar is added to the pan (I’ll remember to use a splatter screen the next time I follow that step), this hot dressing is then poured over the frisée to slightly wilt it. The salad is then topped with the lardons and a poached egg.

The recipe must have an error in it because it never actually mentions that you’re supposed to top the final salad with lardons, but given that the lardons are in the title it would be pretty silly not to include them. Besides, lardons are one of the greatest culinary achievements of mankind. If I could only have one form of cured pork for the rest of my life, I’d choose bacon strips, but lardons are magnificent. They have the advantage of being French and fancy sounding, which makes it easier not to think about the cardiovascular consequences of eating them. The thicker cut also preserves their meaty porcine nature, which bacon can sometimes lose in favour of crispness.

I’ve been working on my egg poaching technique, and things are coming along to the point that I’m almost satisfied. I didn’t add enough water to the pan for these eggs, so they stayed yellow on top, but I find that kind of attractive. I’d love to be able to produce the perfectly spherical poached eggs you get in restaurants, but for now I’m happy with the fact that the whites set, the yolks run, and the come out of the pan in one piece.

This salad was exceedingly good. I broke my egg and let the yolk run all over the greens. where it combined with the already rich bacon dripping based dressing. This is the kind of decadence I can’t help but smile and make incoherent consonant sounds in response to. The vinegar and shallots were nice contrasting flavours. Eggs and bacon for breakfast have to to pair well with coffee and orange juice, so red wine vinegar doesn’t play a big role on brunch menus, but it worked quite well here.

My uninformed choice of salad greens took away from the recipe a bit. Actual frisée is much crunchier than the soft lettuce I chose. The hot dressing wilted my salad in a less than appealing way, but with a sturdier green it would have worked very nicely indeed. Frisée is also more bitter and flavourful than curly lettuce, and might have stood up to the robust dressing a bit better. Oh well, it was delicious. I’ll get it right next time.

Some of my favourite childhood memories are of my Mom coming home late, and deciding that we should have breakfast for dinner. She’d fry up some eggs and bacon and have three kids fed in under twenty minutes. It was always such a treat, and this recipe captured that special out-of-the-blue feeling.

Categories
Beef, Veal, Pork, and Lamb The Book

104. Beef Tenderloin with Cornichon Tarragon Sauce p.416


The recipe

Some good friends were coming to dinner, and I wanted to make something a bit special. When I’m looking for dishes suitable for an occasion, beef tenderloin is frequently at the top of that list. I had frozen part of the tenderloin I used for the Twenty-First-Century Beef Wellington so it was an easy choice to make. I decided to serve the roast tenderloin with three sauces, the cornichon tarragon sauce from this recipe, a Stilton sauce, and whipped horseradish cream. This sort of a menu seems much more appropriate to the fall weather I’m writing this in, than the summer weather I cooked it in. However, it was a pleasantly warm day, and I made one important change to the recipe. I grilled my tenderloin outside instead of sticking it in a 350 degree oven. The sauces were a bit rich for summer, but that just encouraged restraint.

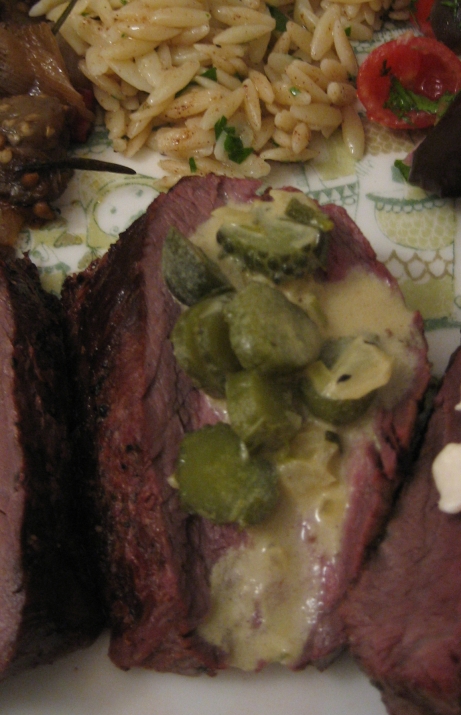
The sauce is made by reducing white wine, shallots and tarragon, then adding cream, thinly sliced cornichons, and a mixture of mustard whipped with butter. This was a seriously powerful sauce. The mustard, tarragon, and shallot flavours were fairly strong on their own, but the cornichons were overpowering. I picked up good quality, imported sour gherkins from France. They were mouth puckeringly sour, without too much other flavour. They were nicely crunchy, but not really my favourite pickle style. The recipe calls for a lot of these little guys, and their concentrated vinegar permeated the whole sauce. My first impression of the sauce wasn’t great, just too sour, and overpowering the somewhat subtle flavours of the tenderloin. As I ate more it grew on me though. Once I stopped making a sourpuss face the underlying flavours came out, and they were good. The sauce also mellowed over the next day, and ended up being in a better balance.

I’m not sure if this is how the recipe was intended to turn out, or I just got a batch of very sour pickles. I think it’s possible I did everything right, because my dining companion preferred this sauce to the other two choices. She agreed that it was sour, but she enjoyed the interplay of the rich creaminess, with the clear vinegar cutting across it. I won’t rush to repeat this one, and if I did I’d try a different brand of pickle, or cut back on them. This sauce had to struggle to get over a bad first impression, but it did redeem itself after a few bites.

Categories
Hors D'Oeuvres & First Courses The Book

23. Vodka-Spiked Cherry Tomatoes With Pepper and Salt p.26


the recipe

This looked like a really simple recipe. Just cherry tomatoes in a vodka based marinade. The blurb in The Book tells us that “what makes these tomatoes special is that they’re peeled. Don’t worry; after you blanch them their skins slip right off”. The book lies! I blanched them well, even a few seconds longer than recommended in loads of boiling water. The skins absolutely didn’t slip off, and peeling the slightly loosened skins was a huge huge pain. The active time for this was more like 2 hours than 45 minutes. I’ll presume that I just don’t know how to peel a tomato though.

The marinade was quite good. Vodka and tomatoes are a classic pairing, apparently there are flavour compounds in tomatoes that are only soluble in alcohol, and without it we’re missing out on part of what the tomato has to give. The zest and vinegar gave the tomatoes a nice citrus bite. It’s becoming a recurring refrain here, but there was too much sugar on these. The recipe calls for a tablespoon to be added, and while I see where they were going with the sweet / citrus / vodka contrast I think they went too far. Vodka is quite sweet on its own, I’d say a teaspoon of sugar would have been more than sufficient. Maybe they calculated that amount using less naturally sweet cherry tomatoes? Who can say.

While peeling these little guys was a big hassle, it really did let the marinade penetrate the tomatoes. The tomatoes were flavour packed, and because they were peeled but not cooked you still got the delightful feeling of them popping in your mouth. I think they were tasty, but on the whole not worth the effort.